Purpose
Learn how to:
- Create new suppliers and supplier contacts
- Qualify quality critical and review standard suppliers
- Maintain suppliers and supplier contacts
- Make Suppliers obsolete
Expected Outcome
- Users are equipped to handle suppliers in SimplerQMS
Prerequisites for all
- Must be logged in to SimplerQMS
- Must be a member of one of these ‘User Groups’ to view records:
- All internal and external users
- Must be a member of one of these ‘User Groups’ to create new records
- All Contributors
Prerequisites for creating Suppliers
- Must be a member of one of these ‘User Groups’
- Purchasing
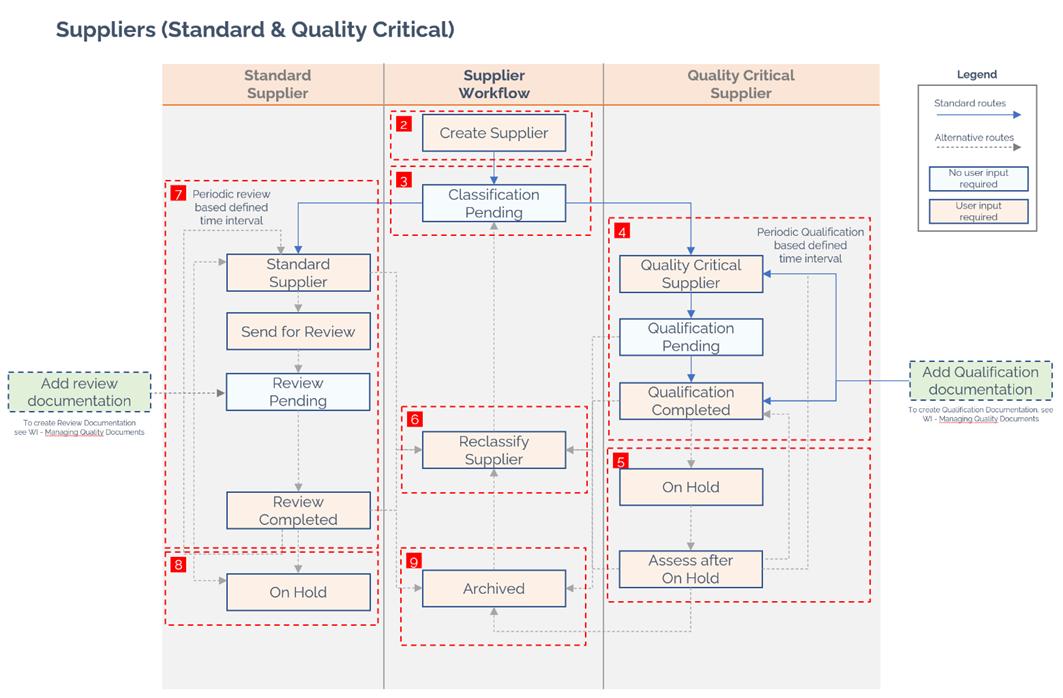
Section 1: Workflow overview
The workflow outlines the actions you can take with the Equipment item in SimplerQMS.
Section 2: Creating a Supplier
Step 2.1 – Create a new Supplier – Initiator
This action requires you to be a part of the Purchasing user group.
There are multiple ways to create a supplier in SimplerQMS:
I. In the Create New section, on your Home Tab, click on Supplier
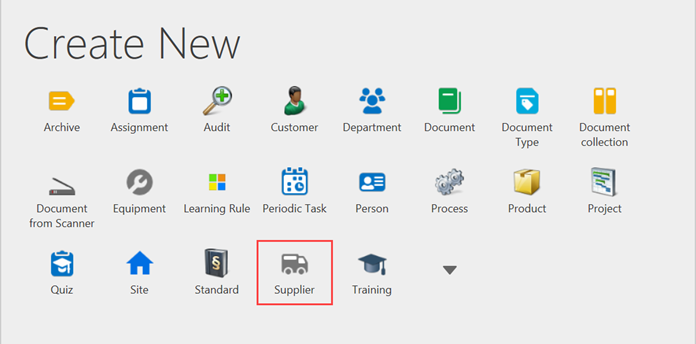
ii. Click on the Create (+) next to the Home Tab and choose Supplier from the dropdown list
iii. On the left side of the screen, expand Create and click on Supplier
A Metadata Card will pop up.
Step 2.2 – Fill out metadata card for the Supplier
Part 1: Supplier Info
| Field name | Description | Note |
| Supplier Name* | The name of the supplier | |
| Site(s)* | The site(s) the supplier is related to | |
| Responsible Person* | The person responsible for the supplier management and qualifying the supplier if quality critical | |
| Supplier Category* | By default, it includes categories A, B, or C, which are outlined and defined in your own procedure for supplier categorization | |
| Supplier Type* | Select if the supplier is Direct or Indirect. This choice will influence the metadata structure. You can also create your own value list on top of the Direct and Indirect values with any Type categorization you would prefer. Since this is a multiselect value, your selection can include wither direct or indirect and any other value you may create. | Direct Supplier: Supplier that delivers the product directly to your organization Indirect Supplier: If your direct supplier is sourcing goods from another supplier you know, you can track them with this option |
| Address Street name* | The supplier street name | |
| Address Postal code* | The supplier postcode | |
| Address City* | The supplier city | |
| Country* | The supplier country | |
| Website, Phone, Email Address, Fax | Contact information for the Supplier | You can also create a contact person |
| DUNS Number | Company registration number |
Part 2: Relations
| Field name | Description | Note |
| Relation(s) | Choose any relations from the dropdown list and a corresponding field will pop up for defining the specific relationships | |
| Product Item | Product(s) related to the supplier |
These fields will be filled automatically:
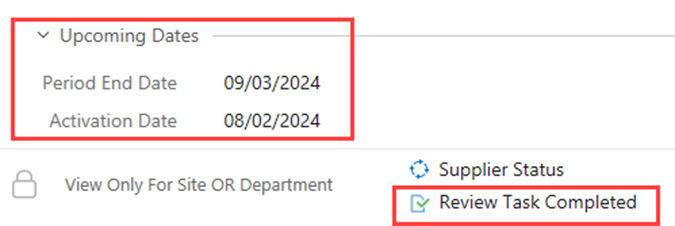
Part 3: Upcoming Dates
| Field name | Description | Note |
| Period End Date | The date when the requalification task / review is due for completion | |
| Activation Date | The date when the requalification task / review is assigned to the responsible person as a notification that a calibration task is upcoming |
Determine the schedule of Requalification / Review
Part 4: Requalification/ Review Schedule
| Field name | Description | Note |
| Interval | The combination of these two fields determines the interval that specifies how often the requalification / review needs to take place | |
| Time Unit | The combination of these two fields determines the interval that specifies how often the requalification / review needs to take place | |
| Time to Complete | The combination of these two fields determines how early before the end of the requalification / review end date should the notification be sent to the responsible person | |
| Activation Time Unit | The combination of these two fields determines how early before the end of the requalification / review end date should the notification be sent to the responsible person | |
| Period Start Date | When the periodic requalification / reviews schedule was last completed |
When you are done filling out the relevant fields, then Click Create
Section 3: Classifying a Supplier – Responsible Person
This action is carried out by the Responsible Person.
Select the new supplier you just created.
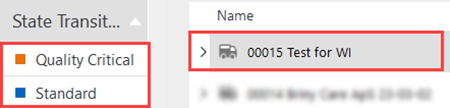
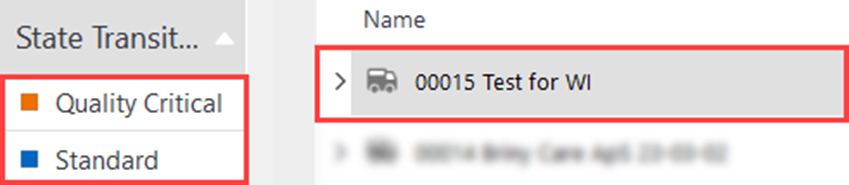
Under “State Transition” on the left side, you can pick
I. “Quality-Critical Supplier” or
II. “Standard Supplier”
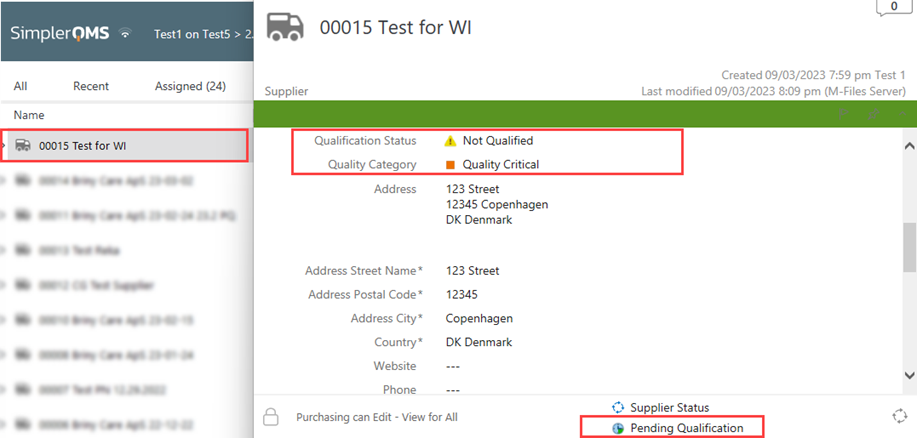
I. Quality – Critical suppliers are those that directly affect your organization. If the supplier you added fits that description, then click “Quality-Critical Supplier”.
- The status should be “Pending Qualification”
- Qualification Status should be “Not Qualified”
- Quality Category should be “Quality Critical”
While state is in Pending Qualification Upcoming properties are empty and the Requalification/Review Schedule are filled by default values with an empty “Period Start Date”.
Refer to Section 3 for qualifying a Quality-Critical Supplier.
I. If this is a Standard Supplier, then click “Standard Supplier”. Standard suppliers are what you register to keep track of and can schedule periodic reviews to reevaluate their importance to your organization.
- Qualification Status should be “Qualification not needed for standard supplier”
- Quality Category should be “Standard”

Refer to Section 5 for reviewing a Standard Supplier.
Section 4: Qualifying a Quality-Critical Supplier – Responsible Person
When you set a supplier as Quality-Critical, you must go through the qualification process. As the Responsible Person, complete this step to create a Supplier Qualification for a specific Supplier.
I. Select the Supplier, which you want to qualify.
II. Click “Create Quality Document” under “Actions” on the left side of the screen.
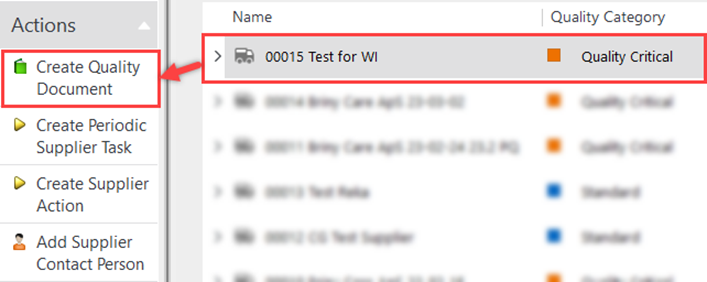
III. Search for the Supplier Qualification Template in the overview, which then pops up and select the template.
IV. Click Next.
To complete the Supplier Qualification, you will need to author, review, and approve a quality document. Follow the instructions from “Working with Controlled Quality Documents” on how to work with Quality Documents.
After completing the Supplier Qualification, click “Qualification Task Completed” in the Task Menu under “State Transition” in the top left corner.
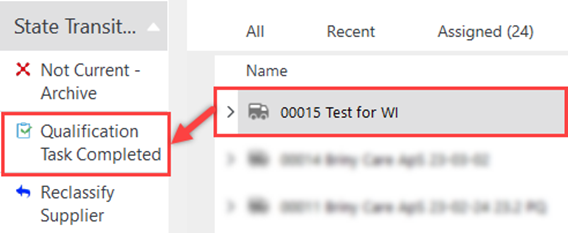
Enter your electronic signature and click Sign to finish the Qualification Task.
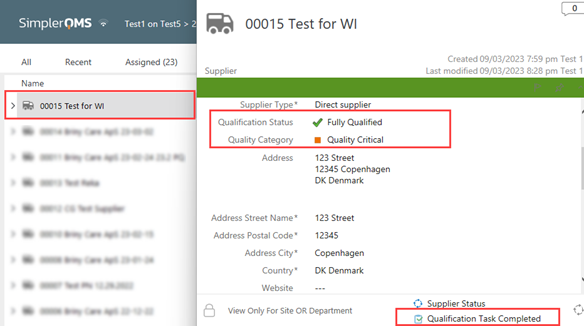
After completing this step, the “Qualification Status” is changed to “Fully Qualified”.
Note: It is not possible to complete the qualification task if the scheduling values are empty.
Step 4.1 – Requalification Schedule
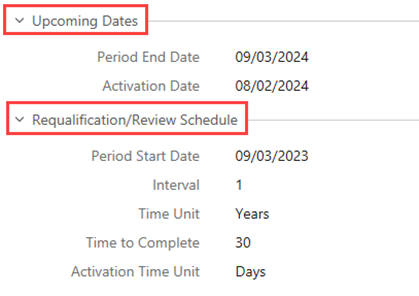
In the metadata card, the “Requalification/ Review Schedule” is automatically populated. This means that the responsible person will be notified on the activation date for re-qualification.
The “Upcoming dates” are based on the scheduling values as shown below:
You do not need to wait for the set period to expire to do the periodic requalification of a quality-critical supplier. By clicking on the “Requalify now” button under State Transition, you can redo the qualification when necessary and new dates for the next time will populate based on when the task was carried out.
Section 5: Set Quality Critical Supplier on Hold
In case a quality critical supplier cannot be used temporarily, the Responsible Person can set Quality Critical supplier on hold by clicking on “Quality Critical Supplier on Hold” under State Transition.
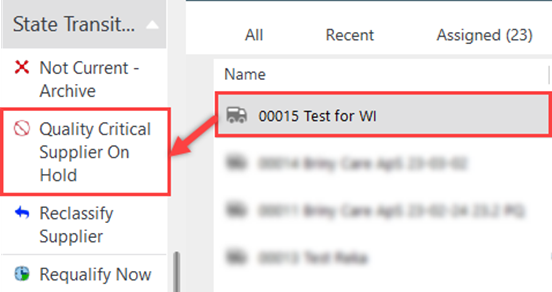
Add “On Hold Reason” on the metadata card, then click on Save.
Step 5.1 – Assess after On Hold – Responsible Person
When you are ready to start using the supplier again or need to stop tracking them, you will be given 4 choices to reactivate / disable the supplier
Click on “Assess after On Hold” under state transition.
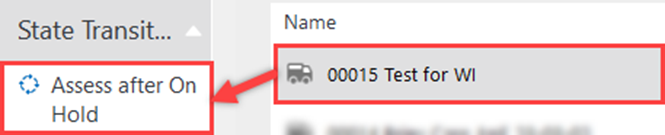
The status should be “Assess after On Hold” and supplier is assigned to the Responsible Person.
The Responsible Person should have the following options under state transition:

- Needs Requalification – when the supplier needs to be requalified as a quality critical supplier after being on hold
- This means that you intend to either change the metadata only for the schedule or information, or want to issue new qualification record(s)
- No Current – Archived – when the supplier needs to be discontinued after on hold
- Qualification State is Unaffected – when the supplier state remains as fully qualified after being on hold
- This means that the supplier will go back on its original qualification schedule set from before being on hold
- Reclassify Supplier – when the supplier needs to be reviewed for reclassification. Refer to Section 5 for Reclassifying of a Supplier.
Section 6: Reclassifying a Supplier – Responsible Person
In case you need to change a supplier’s status from being a Standard Supplier or a Quality-Critical Supplier to the other, you, as the Responsible Person can re-classify the supplier by following these steps:
Select the supplier, which you want to reclassify.
In the Task Area under “State Transition” on the left side of the screen click “Reclassify Supplier”

You can now reclassify the Supplier in the Task Area under “State Transition” and then click either “Standard Supplier” or “Quality-Critical Supplier”, depending on which kind of Supplier you want to change to.
Go to Section 2 and redo the necessary steps.
Section 7: Reviewing a Standard Supplier – Responsible Person
Reviewing a standard supplier is not a mandatory task to do. However, when a standard supplier needs to be reviewed regularly, scheduling values can be set by the Responsible Person.
Find the supplier that needs to be reviewed and click on “Send for Review”.
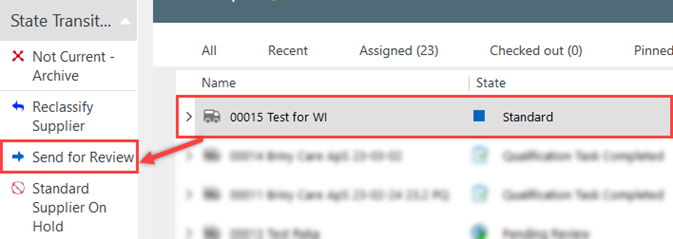
Status should be “Pending Review”, the scheduling values are filled by default and can be edited and set to a preferred value.

When the scheduling values are set, click on “Review Task Completed.”

Enter your electronic signature and then click OK.
The status should now be “Review Task Completed”, and the upcoming dates have been set.
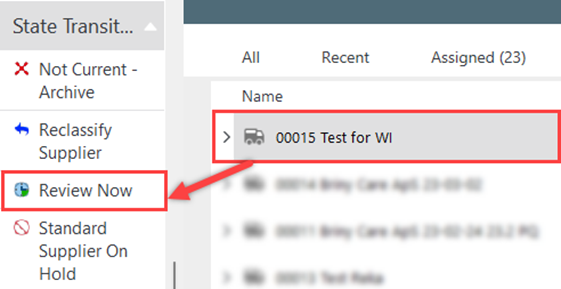
You do not need to wait for the period to expire to review a standard supplier. By clicking on the “Review Now” button under State Transition, you can review your supplier when necessary and new dates will populate based on when the task was carried out.
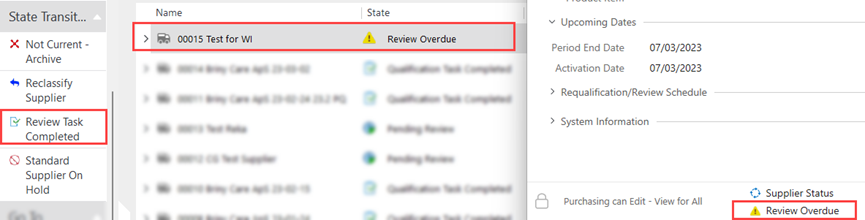
Note: The supplier review can be on the state “Review Overdue!” when it is past the Period End Date. The supplier responsible person will be notified 3 days before overdue. In this case, the review must be completed immediately by clicking on “Review Task Completed” and then enter the electronic signature.
Section 8: Set Standard Supplier on Hold
In case a standard supplier cannot be used temporarily, the Responsible Person can set the standard supplier on hold by clicking on “Standard Supplier on Hold” under State Transition.

Add “On Hold Reason” on the metadata card, then click on Save.
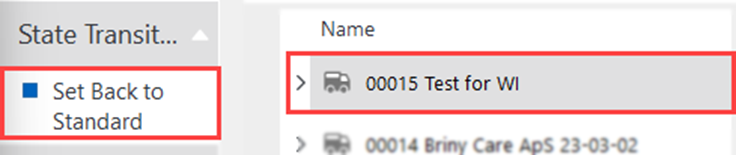
The supplier will stay on hold status until it is turned back to Standard by the Responsible Person when it can be used as a supplier again.
Note: If the Standard Supplier was on review before being set on hold, the previous review schedule will not be reinstated. Instead, you will need to send the standard supplier for review again.
Section 9: Making the Supplier Not Current – Responsible Person
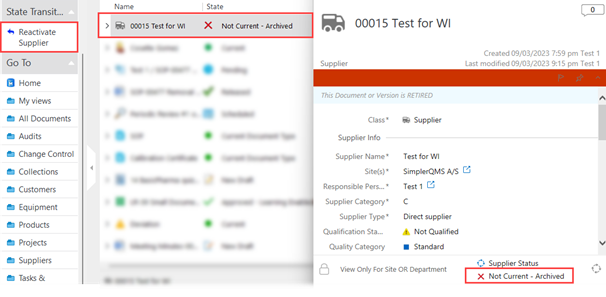
In case a supplier is no longer needed or used, the Responsible Person can mark it as Not Current – Archive.
I. Select the supplier you want to mark as Not Current.
II. In the Task Area under “State Transition” in the left side of the screen click “Not Current – Archive”.

The supplier is now inactive, and the state of the Supplier is changed to “Not Current – Archived” and can no longer be related to documents, equipment etc.
If the supplier is to be used again, after it was marked not current, then:
I. Select the supplier, which you want to make usable again
II. Click on Reactivate Supplier under State Transition
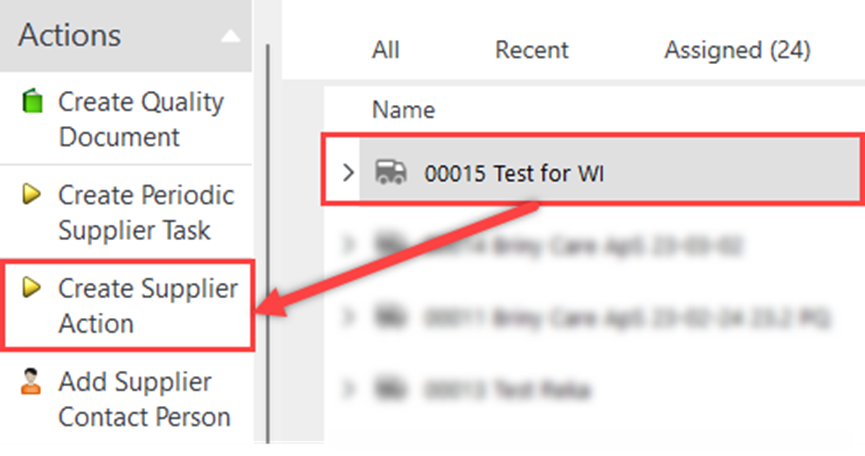
Section 10: Adding Action to a Supplier – Initiator
When an action is created for a supplier, the person assigned to it will be notified to make updates or changes as provided in the action description. Any Initiator can create a supplier action.
Search for the supplier and under Document Actions, click on “Create Supplier Action”.
For further instructions, refer to WI: Actions, Periodic Tasks and Reminder Rule.
Section 11: Adding a Supplier Contact
Step 11.1 – Add a Supplier Contact – Responsible Person
This step can be done by the Responsible Person.
Select the new supplier you just created.
Click “Add Supplier Contact Person” in the Task Area.
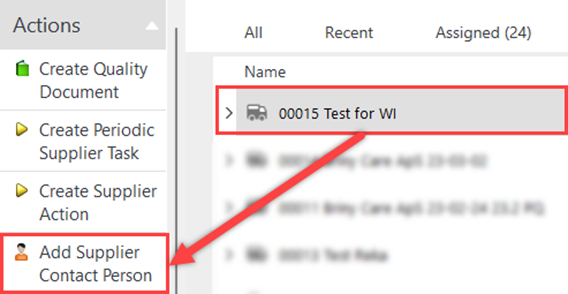
A metadata card will pop up.
Step 11.2 – Fill out metadata card for the Supplier Contact
Part 1: Contact Info – These fields should be filled by the system
| Field name | Description | Note |
| Class* | This should be set to Supplier Contact Person | |
| Supplier* | The Supplier you are adding the Contact Person to | |
| Site(s)* | The site(s) the supplier is related to | |
| Responsible Person* | The person who is responsible for the supplier | |
| Address | This and connecting fields are copied from the Supplier |
Part 2: Contact Info – Fill these fields yourself
| Field name | Description | Note |
| Contact Type | To define what kind of contact your organization has with the supplier contact person you are adding | |
| Department | Which Department the Contact is related to | |
| First Name | The First Name of the Contact | |
| Last Name | The Last Name of the Contact | |
| Job Title | Which job the Contact has | |
| Phone | The phone number of the Contact | |
| Email Address | The email address of the Contact |
Section 12: Creating a Supplier Issue – Responsible Person
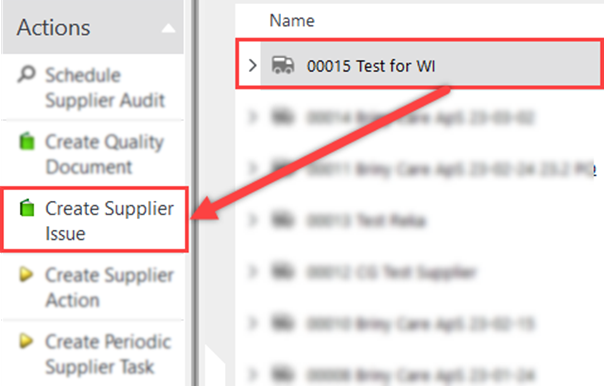
Supplier Issues are created by the Responsible Person.
When there is a need to create a supplier issue, search for the supplier and under Actions, click on “Create Supplier Issue”
For further instructions, refer to WI: Managing Recorded Issues & CAPA.
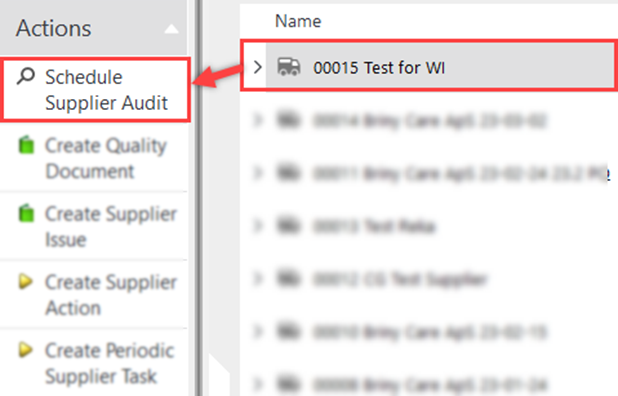
Section 13: Scheduling a Supplier Audit – Responsible Person
This step can be carried out by the Responsible Person. When there is a need schedule an audit, search for the supplier and under Actions, click on “Schedule Supplier Audit”
For further instructions, refer to WI: Managing Audits.