Purpose
Learn how to:
- Create audit plans
- Create audit findings and observation relevant to the audit
- Create CAPA
- Update Audits and findings
Expected Outcome
- Users are equipped to handle audits and related observations in SimplerQMS
Prerequisites for all
- Must be logged in to SimplerQMS 2.8 version
- Must be a member of one of these ‘User Groups’ to view records:
- All internal and external users
- Must be a member of one of these ‘User Groups’ to create new records
- All Contributors
Prerequisites for creating Audit Plans, Audits, Audit Findings and CAPAs
- Must be a member of one of these ‘User Groups’
- Audit Handler – the person to create audit plan & audit and findings
- QA Responsible – User(s) on the Recorded Issue Document with this role are defaulted as CAPA Responsible Person, CAPA Initial Approver(s) and CAPA Approver(s). User(s) defined on in this role have permission to Allow Closure of Recorded Issue without CAPA Closure.
- Issue/CAPA Handler – the person to assess if CAPA is needed or not
- NC Handler – the person to create nonconformance or audit findings related to the audit
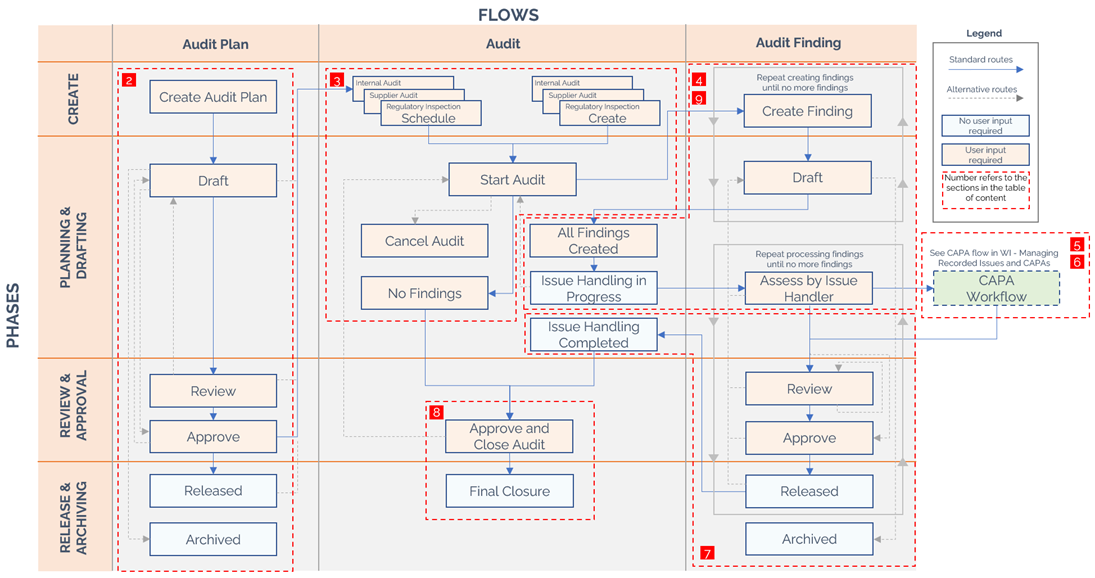
Section 1: Workflow overview
An Audit Plan is often created to plan one or more audits over a time period (i.e a year). These audits (Internal Audits, Regulatory Inspections and Supplier Audits) can be added to the audit plan. For each audit, you can add Audit Findings prior to closing the audit.
Section 1: Creating Audit Plan
Step 2.1 – Create Audit Plan
A user assigned to an Audit Handler user group can create an audit plan document.
There are multiple ways to create an Audit Plan in SimplerQMS:
I. In the Create New section, on your Home Tab, click on Document
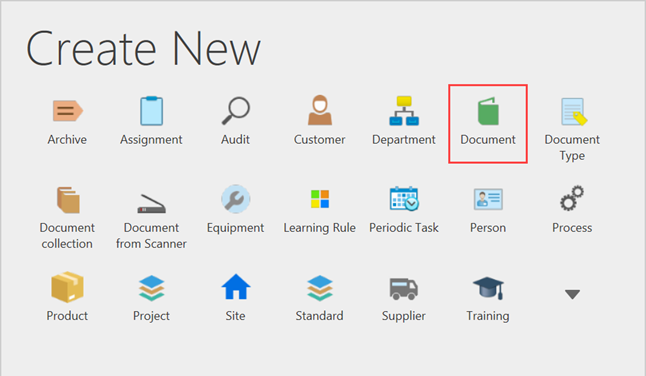
II. Click on the Create (+) next to the Home Tab and choose Document from the dropdown list
III. On the right side of the screen, expand Create and click on Document
IV. Select an approved template for Audit Plan and click on Next.
A Metadata Card will pop up.
Step 2.2 – Fill out the metadata card
I. Fill the following sections on the metadata card:
Part 1: Document Information
| Field name | Description | Note |
| Short Title* | Title of the audit plan | |
| Start Date | Audit plan’s start date | |
| End Date | Audit plan end date | |
| Site(s)* | Site of the audit plan | |
| Document Type* | Preferred doc type, Audit Plan doc type is often selected | |
| Department* | Relevant department of the audit plan | |
| Process* | Relevant process of the audit plan | |
| Archive | If needed, select one or more archives |
Part 2: Workflow Process Information
| Field name | Description | Note |
| Responsible Person(s)* | Select the responsible person for the audit plan | |
| Author(s)* | Select the author(s) | |
| Reviewer(s) | If needed, select the reviewer(s) | |
| Effective Date | If you know the effective date at this stage, select the effective date | |
| Approver(s)* | Select the approver(s) |
II. Click on Create after filling out all necessary information. The working copy opens, and the state should be New Draft.
Step 2.3 – Draft Audit Plan and send for review and approval
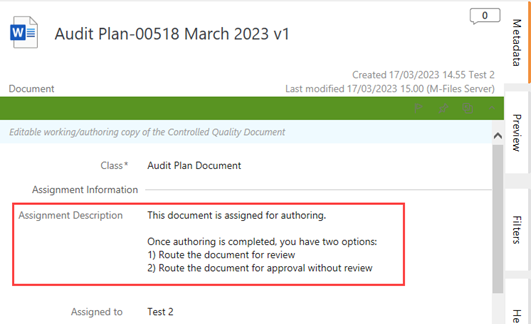
I. Audit Plan Author
a. Receives a notification about the audit plan and document can be found in the author’s Assigned Tab
b. Check Out the document and start drafting the content.
Save and check in the document
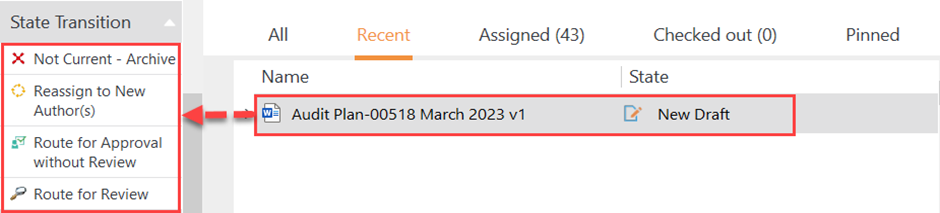
II. After drafting the audit plan, you have 3 options in the State Transition menu. You can either select:
a. Not Current Archive – if you wish not to continue and to archive the audit plan.
b. Reassign to New Author(s) – if there’s a need to replace the initial author assigned; this is only available to a Responsible Person.
c. Route for Approval without Review – if you wish to skip the review part of the audit plan.
d. Route for Review – to allow the reviewer to check the plan.
Same flow should apply from the review, and approve process for the Audit Plan, in the WI: Quality Documents without Change Request, section 5 to 7 and continue with the next Step II after.
II. Once Audit Plan is approved and in the Released State
a. In the State Transition, the audit plan author or responsible person can Route for Updates or Route for Retirement if needed.

b. While under Actions, an audit handler will have the option to schedule a new internal audit, a regulatory inspection, or a supplier audit. These can also be scheduled as soon as the Audit Plan is created, hence it does not need to be released.
Section 3: Creating an Audit
You can create an Audit without an Audit Plan in case it is needed (i.e., for an unannounced audit). Usually, an Audit is linked to an Audit Plan as the plan covers the general strategy and approach for the expected nature, timing, and extent of one or more audits.
You can create the following audit types in SimplerQMS
- Regulatory Inspection, Supplier Audit, Internal Audit
Step 3.1 – Schedule an Audit
A user with an audit handler user group can schedule a regulatory inspection.
There are multiple ways to create an Audit in SimplerQMS
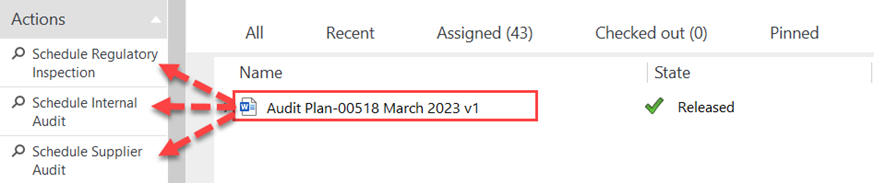
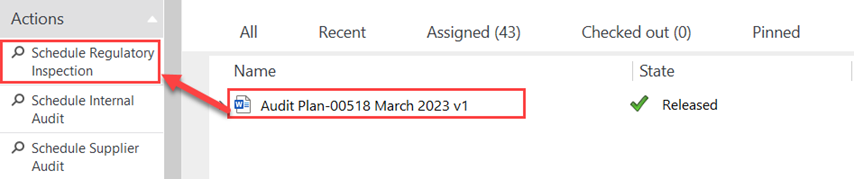
I. When the audit is related to an audit plan, select the audit plan, and click on one of the three audit scheduling options under Actions.
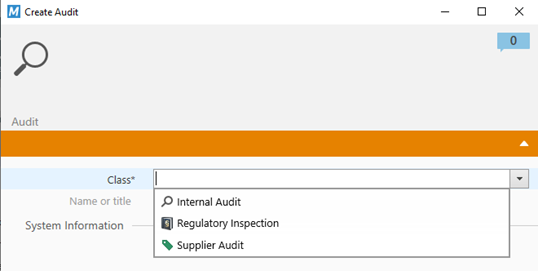
II. When the audit is a stand-alone document or not related to an audit plan, from the home screen, click on create (+), and select Audit. Metadata will pop up, and select the audit class, in this step select Regulatory Inspection
Step 3.2 – Fill out metadata card
I. Fill the following sections on the metadata card:
Part 1: Audit Info
| Field name | Description | Note |
| Class* | Regulatory Inspection, Supplier Audit, or Internal Audit | |
| Short Title* | Title of the audit plan | |
| Site(s)* | One or more sites should be selected | |
| Supplier | Add the name of the supplier. The list is determined by the site chosen. | Only Supplier Audit |
| Responsible Person (Internal Auditor) * | The person responsible for the audit internally | |
| Auditor (Supplier) | Option to add an auditor as a supplier who may provide assistance with the internal audit. | Only Internal Audit |
| Auditees (Internal)* | The person responsible for the audit internally | Regulatory Inspection and Internal Audit |
| Auditees (Supplier)* | The supplier contact person responsible for the audit | Only Supplier Audit |
| Auditors (Regulatory Authority) * | Provide the name or the notified body | Regulatory Inspection |
| Process* | Assign a relevant process | Only Internal Audit |
| Description | If needed, add the audit description |
Part 2: Processing Info
| Field name | Description | Note |
| Approver(s)* | Audit approver(s) |
Part 3: Timing
| Field name | Description | Note |
| Start Date | Audit start date | |
| End Date | Audit end date | |
| Date Closed | Filled by the system once audit has been closed |
Part 4: Relations
| Field name | Description | Note |
| Related Audit Findings | This will automatically fill out by the system when there is a finding created related to this audit | |
| Audit Plan | When an audit is created from the audit plan, the audit plan document will be automatically related |
II. Click on Create after filling out all necessary information. The state should be Planned.
Step 3.3 – Start the Audit
Once the audit has been created and planned, it automatically assigns to the audit handler.
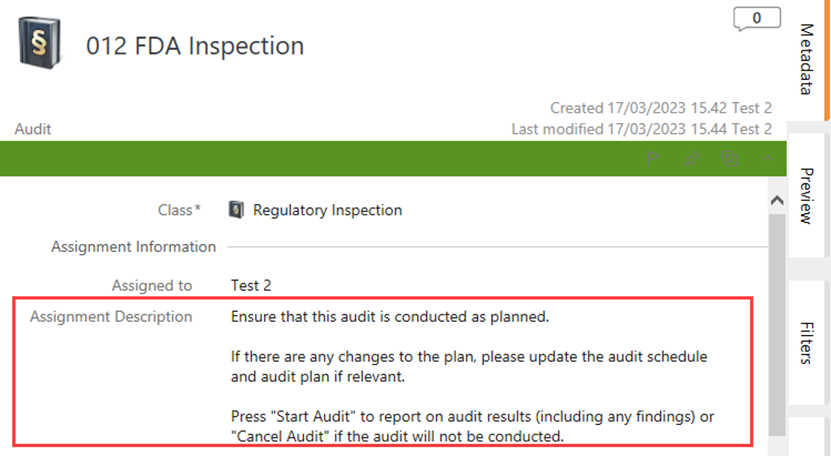
I. Refer to the assignment description as a guide for the next steps
II Select the audit and in the state transition, click on start audit or cancel audit. In this step, click on start audit and proceed to Section 4.

Once the audit has been started, the state should be Audit Started – Findings Can be Added.

NOTE: If you wish to cancel an audit, an electronic signature is required. The status will become Cancelled – Never Conducted. At this stage, no changes can be made to the audit.

Section 4: Adding and Creating Audit Findings
Once the audit has been created, the audit findings can now be added. This can be accomplished by a user with audit handler user group.
Step 4.1 – Create Audit Finding – Author
I. Select any of the following audits that have been created – in this instruction, audit findings for a regulatory inspection audit will be described
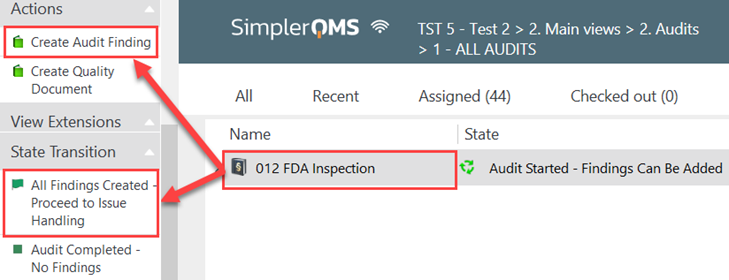
II. Under Actions, click on Create Audit Finding

III. Select an approved template for Recorded Issue Document, in this step, we will select a Nonconformance template
IV. Fill the following sections on the metadata card:
Part 1: Document Information
| Field name | Description | Note |
| Class* | Recorded Issue Document | This is automatically selected when created from an audit |
| Short Title* | Title of the audit finding | |
| Site(s)* | One or more sites should be selected | |
| Document Type* | Select the relevant Document Type, Audit Finding or other record issue type is often selected | |
| Department* | The relevant department | |
| Process* | The relevant process | |
| Archive | If needed, select one or more archives | |
| Severity | Select between negligible, low, medium high depending on how your company describes severity | |
| Category | Multi-select field, where more than just one category is possible. Based on a list that the metadata administrator can create. |
Part 2: Workflow Process Information
| Field name | Description | Note |
| Responsible Person(s)* | Select the responsible person | |
| Author(s)* | Select the author(s) | |
| Reviewer(s) | If needed, select the reviewer(s) | |
| Quality Assurance Responsible | The assigned QA Responsible will automatically be assigned as CAPA Responsible person, initial and final approver if CAPA has been assessed as needed. | Person needs to be member of the Quality Assurance Responsible user group to be selected |
| Issue Handler* | The user to assess if CAPA is needed for the audit finding | Member of the CAPA/Issue Handler user group |
| Approver(s)* | Select the approver(s) | |
| Due Date* | Assign a due date for the audit finding to be completed. 3-days before the due date, a notification will be sent to the author, and the responsible person of the audit finding | |
| Effective Date | If you know the effective date at this stage, select the effective date |
Part 3: Relations
| Field name | Description | Note |
| Related to CAPA | Automatically generated when the audit finding has related CAPAs | |
| Result of Audit | Automatically related to the audit where the finding has originated | |
| Relation(s) | If the audit was based on the audit plan, the audit plan will automatically be a relation. Multiple relations can be manually added | |
| Audit Plan | The audit plan will automatically be related |
V. Click on Create when all necessary information has been filled.
VI. The working copy opens, save, and close the document and let the audit finding author to continue with the drafting. State should be New Recorded Issue Draft.
Step 4.2 – Draft the Audit Finding – Author
When the audit finding has been created, it assigns to the author and will be ready for editing.
I. Receives a notification about the audit finding and document can be found in the author’s Assigned to Me box, drafts the document in the working copy, saves the document and check in, you can also refer to the assignment description as a guide.

II. After drafting the audit finding, in the state transition, the author can select either Draft Completed – Notify Issue Handler or Not Current – Archive
Step 4.3 – Notify Issue/CAPA Handler of the Audit Finding – Author
Once the audit finding has been drafted, the audit finding author should notify the Issue/CAPA handler to assess if CAPA is needed or not
I. Click on Draft Completed – Notify Issue Handler

II.The state should now be Awaiting the Creation of All Audit Findings
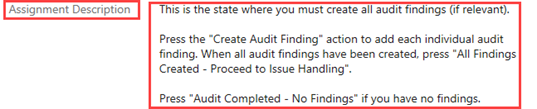
NOTE: The audit handler should add all the audit findings at this point. The audit can proceed to Issue Handling when all findings have been created.
The audit can be re-opened to add more findings if needed at a later stage. See step 8.1 Re-open to Add Findings or Close Audit and Send for Approval
Audit Completed – No Findings – is selected when there were no findings.
III. Issue Handler will be notified about the audit finding; however, no further actions can be taken until the audit has been sent for issue handling
The audit finding will be assigned to the Issue/CAPA Handler and no further actions can be taken.
Step 4.4 – Proceed to Issue Handling – Audit Handler
When all the audit findings have been added to the audit, the audit handler should proceed by moving the audit forward when no more audit findings are to be added.
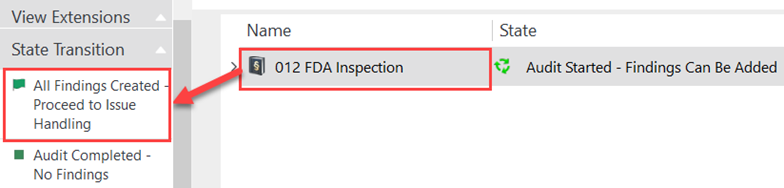
I. Select the audit and click on All Findings Created – proceed to Issue Handling under “State Transition”. This will enable the issue handler to process the audit findings and make pre-assessment report and conclude if CAPA is needed.
Once the audit finding has been sent for issue handling, the audit status will be Issue Handling in Progress. The audit handler can also re-open to add more findings if necessary through “State Transition” click Reopen to Add Findings.
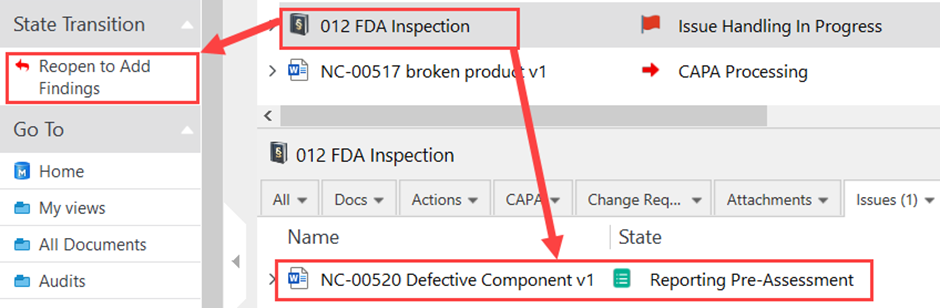
And the audit finding state will move to Reporting Pre-Assessment. The Issue/CAPA handler can now proceed with the assessment.
Section 5: Reporting Pre-Assessment and Creating CAPA
Once all the audit findings have been created and no additional findings, the Issue/CAPA handler can now proceed to assess if a CAPA is needed for each finding.
See the Assignment Description:
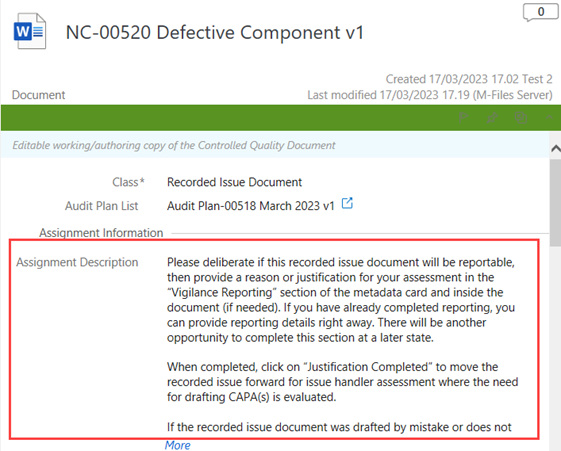
You can find a detailed workflow of the Recorded Issue and CAPA process in the WI – Managing Recorded Issues and CAPAs in Section 1.
Step 5.1 – CAPA is not Needed- Issue/CAPA Handler
When the audit finding has been assessed as no CAPA is needed. The Issue/CAPA handler can close the assessment.
I. Select the audit finding, in the state transition, click on Assessed – No CAPA

Enter your electronic signature.
State will move to Assessed – No CAPA Needed.

II. Once the audit finding has been assessed as No CAPA needed:
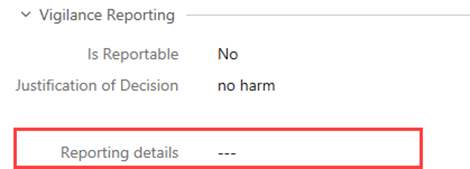
a. the audit finding can now complete its reporting within the document (optional) and the metadata fields (mandatory).
b. Under “State Transition” click Reporting Completed

III. When the audit finding is sent back to the draft, it goes back to New Recorded Issue Draft where to notify the issue handler is an option again and assessment to CAPA can begin. Refer to Section 4:4.3 of this instruction.
Step 5.2 – Create CAPA – Issue/CAPA Handler
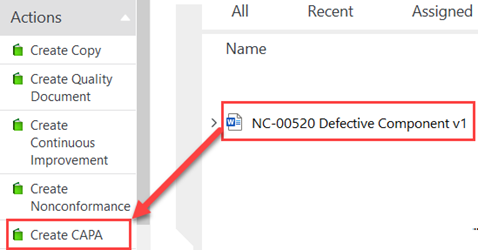
When the audit finding has been assessed as CAPA is needed. The issue/CAPA handler can create the necessary CAPA.
I. Select the audit finding, and under Actions, click on Create CAPA
II. Select an approved CAPA template, and click on Next
III. Fill out metadata card
Part 1: Document Information
| Field name | Description | Note |
| Class | CAPA | |
| Short Title* | Title of the CAPA | |
| Site(s)* | Select the site where the CAPA belongs | |
| Document Type* | Select CAPA as the document type | |
| Department* | Department of the audit plan – QA or Management is often selected but still depending on your organization | |
| Process* | Select CAPA as process | |
| Archive | The CAPA can be related to archives | |
| CAPA Severity | Select between Major and Minor | The definition of the options can be described in your CAPA procedure for further details |
| CAPA Status | It automatically describes the current state of the CAPA | |
| Category | Multi-select field, where more than just one category is possible. Based on a list that the metadata administrator can create. |
Part 2: Workflow Process Information
| Field name | Description | Note |
| Responsible Person(s)* | The audit findings QA Responsible is automatically assigned as the CAPA responsible | This can be changed if needed |
| Author(s)* | The user to draft and provide necessary information in the CAPA | |
| Initial Reviewer(s) | Optional initial reviewer of the CAPA | |
| Initial Approver(s)* | The audit findings QA Responsible is automatically assigned as the Initial approver | This can be changed if needed |
| Reviewer(s) | Optional reviewer of the CAPA | |
| Approver(s)* | The audit findings QA Responsible is automatically assigned as the final approver | This can be changed if needed |
| Due Date* | Assign a due date for the CAPA to be completed | |
| Effective Date | CAPA effective date – this field is not required until when sending for final approval |
Part 3: Relations
| Field name | Description | Note |
| Related Recorded Issue | Automatically generated when the audit finding has related CAPAs | |
| Relation(s) | If the audit was based on the audit plan, the audit plan will automatically be a relation. Multiple relations can be manually added | |
| Standard Chapter | Add the chapter related to CAPA | |
| Initiated from Template | Automatically generated if CAPA was initiated from an approved template | |
| CAPA Attachments | Automatically generated as related when a CAPA attachment is created |
I. Click on Create after filling out the necessary information
II. The working copy will open, save, and close. The state should be New Draft.
Continue with Step 5.3 or 5.4 per instructions in Step 5.3
Step 5.3 – Closure of Audit Finding with Open CAPA – QA Responsible
You can skip this step if you do not want to close the Audit Finding prior to completing and closing the CAPA.
NOTE: The Audit Finding can be moved forward immediately without waiting for the CAPA processing, if needed. This should only be done in alignment with your company procedures. It is only the QA Responsible user role who can see and press the button ‘Allow Closure of Recorded Issue without CAPA Closure’ when the Recorded Issue is selected.
When a CAPA is created, the Audit Finding goes into a CAPA Processing state and waits for the CAPA to be processed and closed before the Audit Finding can be closed.
The state should be CAPA Processing.
However, the audit finding can be closed, if necessary, even when the CAPA is still open.
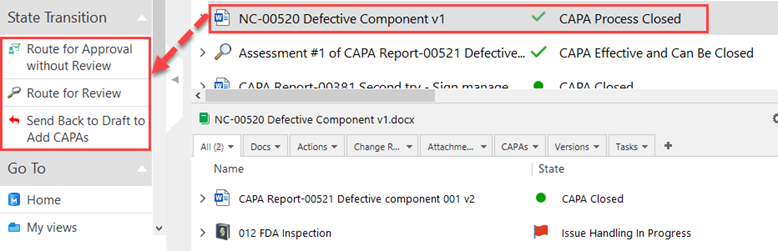
I. Select the audit finding, under state transition, click on Allow Closure of Recorded Issue without CAPA Closure
II. Enter the electronic signature to complete the closure
III.The audit finding will then be assigned to the audit finding author to proceed with the next step

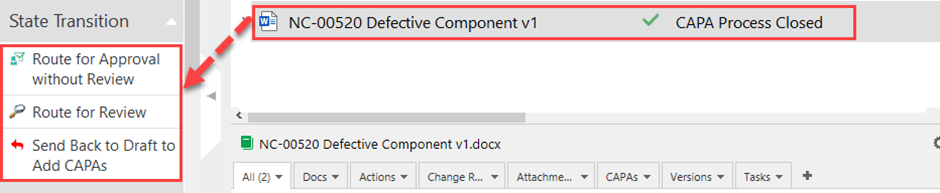
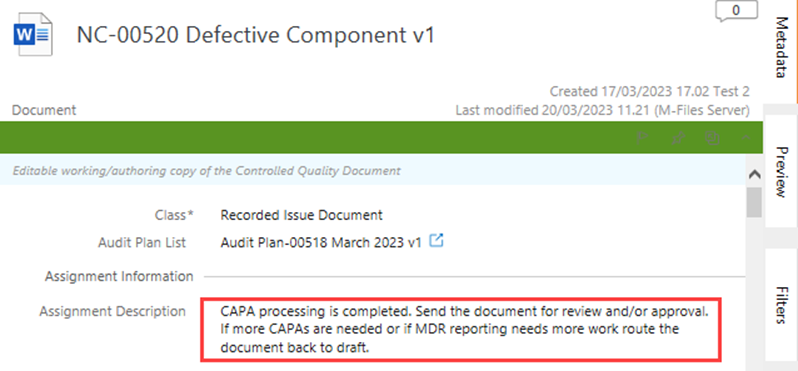
Although the CAPA is still open and on Draft when the audit finding has been closed, the audit finding state will become CAPA Process Closed. The audit finding author can now send the document either for review, approval or back to draft.
NOTE: The related CAPA to this audit finding should be moved forward and can continue the steps as it is to complete the CAPA without affecting the state of the audit finding.
Step 5.4 – Draft of the CAPA – CAPA Author
When the CAPA has been created, it assigns to the author and will be ready for editing.
I. The author receives a notification about the CAPA, and the document can be found in the author’s Assigned to Me view. Then draft, save and check-in the document. Please see the guidance in the assignment description also.
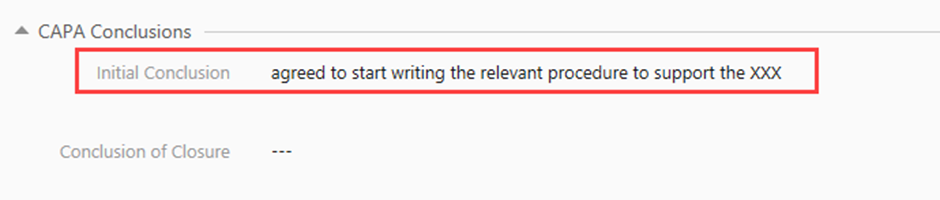
II. After drafting the CAPA, in the metadata card, add the initial conclusion. It should describe the initial decision for the CAPA.
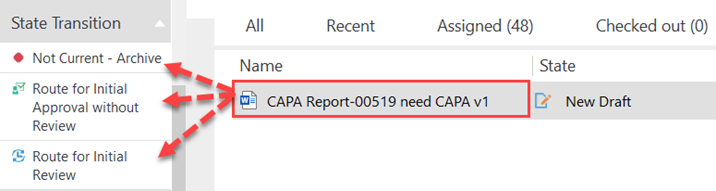
III. Once the Initial conclusion has been added, in the state transition, the author can either select Not Current – Archive, Route for Initial Approval without Review, or Route for Initial Approval.
IV. Once the CAPA has been initially approved, the document will be assigned to the CAPA author for further actions and the state should be Ready for Execution.

Section 6: CAPA is Ready for Execution
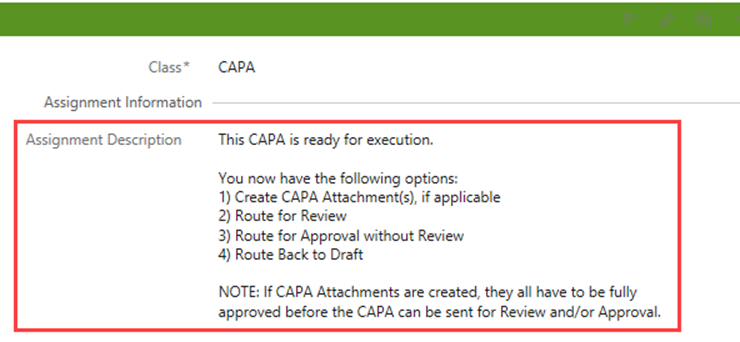
At this stage, the initial draft and approval have been completed and the CAPA is now ready to continue to the next steps.
I. Refer to the assignment description as a guide
Step 6.1 – Create CAPA Attachment – CAPA Author
Skip this step if CAPA Attachments are not needed.
A CAPA Attachment is often used for splitting the CAPA process up into several parts. It is generally easiest to work with all the related CAPA documents via the Detail Listings view, when selecting the main CAPA.
Refer to WI: Managing Recorded Issues and CAPAs Section 5 and see the workflow in Section 1.
Step 6.2 – Final Draft of CAPA – CAPA Author
Given that there is no CAPA Attachment or the CAPA attachment has been fully approved. The main CAPA document is ready for final drafting.
I. The CAPA author checks out the document and makes the final changes
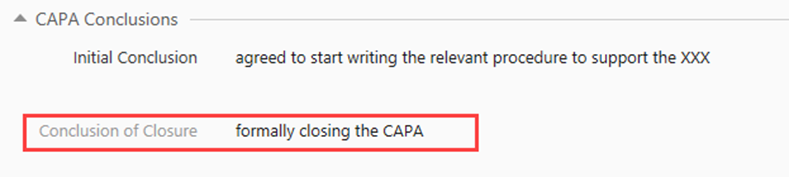
II. In the metadata card, the Conclusion of Closure is mandatory to fill out before sending for final approval
III. Once the conclusion for closure has been added, in the state transition, the author can either, Route Back to Draft, Route for Approval without Review, or Route for Review.

NOTE: Add the effective date before sending for final approval, if not set at the creation of CAPA.
IV. Once all the approvals have been captured, the state should be CAPA Pending Effectiveness

Refer to WI: Assessing Effectiveness of CAPA, to further describe the next step for CAPA effectiveness.
Once the CAPA has been completed after the Effectiveness assessment; state will move to CAPA Closed

The audit state will still be in Issue Handling in Progress

The next steps are to close the Audit Finding and the Audit.
Section 7: Sending Audit Finding for Review and Approval
Once the CAPA has been closed, the audit finding is ready for final drafting and can be sent for review and approval.
Step 7.1 – Step 7.1 Final Draft of Audit Finding – Author
I. Receives a notification about the audit finding and document can be found in the author’s Assigned Tab box, drafts the document in the working copy, saves the document and check in, you can also refer to the assignment description as a guide
II.After drafting the audit finding, in the state transition, the author can select either Route for Approval without Review, Route for Review or Send Back to Draft to add CAPAs
III.When the audit finding is sent back to the draft, it goes back to New Recorded Issue Draft where to notify the issue handler is an option again and assessment to CAPA can begin. Refer to Section 5:4.2 of this instruction.
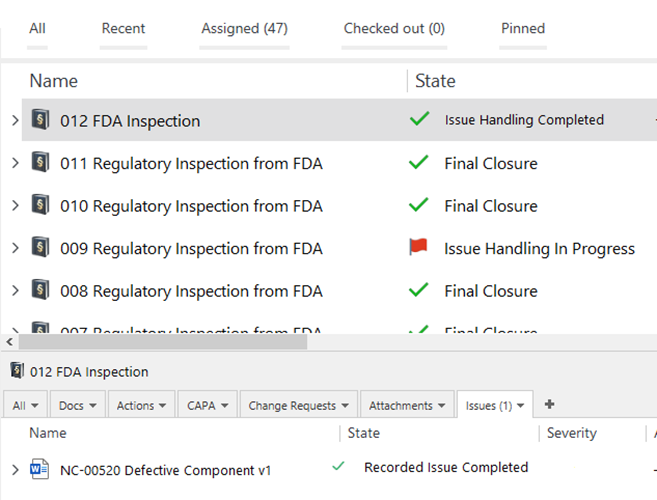
IV. When all the approvals have been captured, the sate will move to “Released” and after an hour the state should be Recorded Issue Completed to Final Closure of Recorded Issue, and no further actions can be taken

Proceed to the next step for closing the audit.
Section 8: Closure of Audit
Once all the related audit findings are in the state Recorded Issue Completed, the audit handler can proceed to close the audit.
Step 8.1 – Re-open to Add Findings or Close Audit and Send for Approval
I. Select the audit, in the state transition, click on Close Audit and Route for Approval
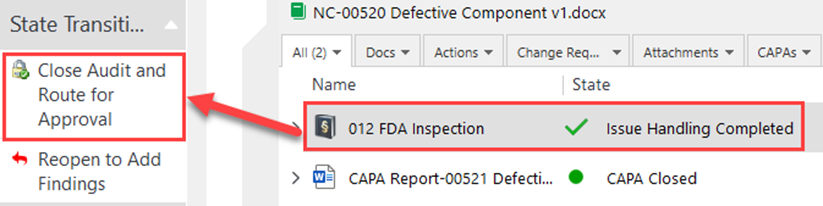
At this stage, if more findings need to be added the audit handler can re-open the audit and start adding the findings. You can refer to Section 4 of this instruction.
II. Enter the electronic signature to complete the closure
III.Once all the approvals have been captured, the audit state should be Final Closure.

At this stage, even when the audit has already been closed. The audit handler can still reopen to add more findings, if necessary, under the State Transition click “Reopen to Add Findings.

Section 9: Routing Audit Findings for Updates
The audit finding works as a stand-alone document which can be updated even if the audit has already been closed.
When update is necessary, the audit finding author or responsible person can accomplished the update.
Step 9.1 – Route Audit Finding for Updates – Author/ Responsible Person
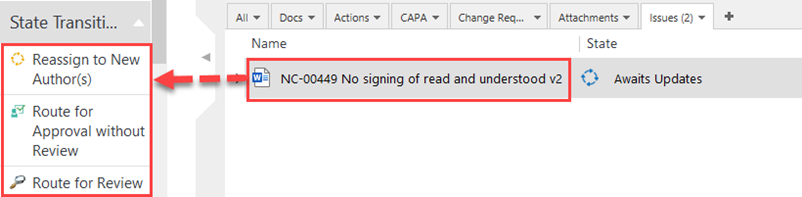
I. Select the audit finding, in the state transition click on Route for Updates

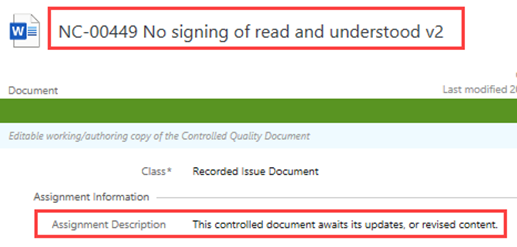
II. The audit finding will generate a version 2 of the document, and automatically assigns the document to the author. The state should be Awaits Updates

Step 9.2 – Draft of the Audit Finding – Author
When the audit finding has been updated, it assigns to the author and will be ready for editing.
I. Receives a notification about the audit finding and document can be found in the author’s Assigned Tab box, drafts the document in the working copy, saves the document and check in
II. Once the drafting is completed, the author can send the document for review or approval
Make sure that the effective date is added before sending for approval.
III. Once all the approvals have been captured, state is Recorded Issue Completed.