Purpose
Learn how to:
- Locate and view the periodic tasks for assessing effectiveness of CAPA
- Assess the CAPA effectiveness with 3 options:
- Close ineffective CAPA and create a new CAPA for further processing
- Reopen ineffective CAPA
- Assess and close effective CAPA
- Reschedule assessments
- Trigger a manual or immediate effectiveness check
Expected Outcome
- Users are equipped to handle assessment of CAPA effectiveness in SimplerQMS
- Periodic tasks ensure that CAPAs are assessed for effectiveness
- CAPAs with a conclusion are set to close and the status should be “CAPA closed”
- All decisions are captures including electronic signature
- Ineffective CAPA actions trigger further processing
- Related issue (complaint, NC, supplier issue, audit finding or continuous improvement) is set to “Final Closure of Recorded Issue” after CAPA assessed as effective
Prerequisites for all
- Must be logged in to SimplerQMS
- Must be a member of one of these ‘User Groups’ to view records:
- All internal and external users
- Must be a member of one of these ‘User Groups’ to create new records
- All Contributors
Prerequisites for Assessing CAPA effectiveness
- Must be assigned to the following roles in the CAPA
- CAPA Responsible Person
- All persons in the QA Responsible user group will automatically be assigned to the Effectiveness Assessment Task
Section 1: Workflow overview

A CAPA Effectiveness Assessment is a periodic task that is automatically generated after a CAPA has been approved and released. The purpose of the assessment is to verify the effectiveness of the CAPA. The assessment should determine if the CAPA is effective or not. Based on the decision, follow section 4, 5 or 6.
While section 4 indicates the last actions or steps to be performed to close an effective CAPA, choosing 5 and 6 will result in a new Effectiveness Assessment task to be generated that needs to be assessed again.
An example of a path could therefore be 3 -> 5 -> 3 -> 4
Illustrative timeline
Below is an illustration of the timeline for a Recorded Issue, CAPA and the Effectiveness Assessment. The objective is to provide the user with an idea of how the flows and processes are interlinked. In addition, a visualisation of how the Scheduling values works for the effectiveness task. Please note below is only illustrative and simplified i.e., CAPA Attachments and Change Requests are not covered, reviews are not reflected, documents may be sent back for drafting or go into overdue states etc.

Section 2: Finding and Viewing Effectiveness Assessment task
When a CAPA has been approved, it generates an effective version (in PDF format) of the CAPA, which contains a periodic task for assessing the CAPA effectiveness.
Step 2.1 – Find the Effectiveness Assessment
The quickest way to find the task is to locate it in the Assessments tab in Detail Listings or search for the document number or per option I and II below:
I. From Detail Listings: From the CAPA view in the Task Area, select the CAPA document, and select Detail Listings under View Extensions

ii. This will show related items below, click on Assessment tab to view the periodic task.
II. Via Search for the document number and unfold the Periodic Task group if needed

Alternatively, you can find it via the Effectiveness Assessments view or in the Assigned to Me window per option III and IV.
III. From Effectiveness Assessment view: From the Home screen, go to Main views -> Tasks & Assignments -> Effectiveness Assessments view and locate the task

IV. The periodic task will automatically assign to the CAPA responsible person when it reaches the activation date. A notification will be sent via email, and the periodic task can be found in the Assigned to Me box.
The status of the Effectiveness Assessment can be found on a CAPA’s metadata card under the field CAPA Effectiveness Assessment. In addition, most CAPA views will have visible column that provides you the same information. This indicates to the user what actions needs to be taken on the CAPA if it is not already closed.

Step 2.2 – View the CAPA Effectiveness Metadata
Once you have located the periodic task for the CAPA effectiveness, the metadata contains information about the CAPA and the assessment of effectiveness.
| Field name | Description | Note |
| Version to Review* | Name of the effective PDF version of the CAPA to be assessed. | Read-only |
| Controlled Working Copy | Name of the working copy of the CAPA | Read-only |
| Responsible Person | One or more persons who will be responsible for assessing the effectiveness Sourced from the Responsible Person(s) of the CAPA. | All persons in the QA Resp. user group will be assigned to the Effectiveness Assessment. Read-only |
| Signature | Filled when task has been approved. | Read-only |
| Field name | Description | Note |
| Activation Date | Date when the Responsible Person is notified to assess effectiveness. Calculation: Period End Date – Time to Complete = Activation Date Example: 15 Feb 2023 – 14 days = 1 Feb 2023 | Read-only |
| Period End Date | Due date for the assessment to be done. The state of the task will change to overdue if assessment has not been done by this date. Calculation: Period Start Date + Interval = Period End Date Example: 1 Jan 2022 + 45 days = 15 Feb 2023 | Read-only |
| Date Approved | Date it is signed and approved | Read-only |
| Periodic Task Number | Numeric value identifying the periodic task | Read-only |
Scheduling values are system generated but can be changed if you reschedule the task. The due date (Period End Date) for the assessment is calculated at 45 days from the effective date of the released CAPA (the PDF version). The Activation Date is set to 14 days before the due date and on the Activation Day, a notification email is sent to the assigned responsible person and an assignment is generated in SimplerQMS.
If you need to change the scheduling values to reschedule the task, go to Step 3.1 – the assessment – Responsible Person
| Field name | Description | Note |
| Interval* | (Time) Interval is default 45 days from the Effective Date of the released CAPA to the due date (Period End Date) of the assessment task. Example: A released CAPA’s effective date is 1 Jan 2023, then due date of the task is 15 Feb 2023. | Read only Reschedule to change. |
| Time Unit* | Time Unit, together with the Interval, reflects the time the Responsible Person is given to assess the effectiveness before the deadline (Period End Date). | Read only Reschedule to change. |
| Time to Complete | Time to Complete determines the date of the Activation Date. It indicates the time (i.e. no. days) before the deadline on, on which an assignment is created and email notification is sent. Example: The Responsible Person is notified 14 days prior to Period End Date (on the Activate Date). | Read only Reschedule to change. |
| Activation Time Unit | Activation Time Unit, together with the Time to Complete indicates the time (i.e. no. days) before the deadline, on which an assignment is created and email notification is sent. | Read only Reschedule to change. |
| Period Start Date* | Equal to the Effective Date of the released CAPA. See Note above table for further explanations. |
NOTE:
The Effectiveness Assessment task will only be triggered and created when the released version of the CAPA moves into the “Effective” state.
The effective date (also the Period Start Date on the task) on the released CAPA determines when this happens:
If the Effective Date on the working copy of CAPA is:
I. In the past or today then
-> The released version of the CAPA becomes effective immediately when the CAPA is approved and gets the same effective date as the approval date (even though the effective date of the working copy is different)
II. In the future then
-> The released version of the CAPA goes into a “For Learning” state when the CAPA is approved and will first become effective on the on effective date (in this case, the effective date is the same on the working copy and released CAPA)
To force the released CAPA into an effective state, select the released CAPA and press “Make Effective Immediately”. This will trigger the task to be generated.
Section 3: Rescheduling or Starting CAPA assessment
When the assessment is on the state Scheduled, no changes can be made in the metadata.

If the periodic task needs to be rescheduled, the CAPA responsible person can make this adjustment.
NOTE:
The option to reschedule is only possible (in the “Scheduled” state) when the Activation Date is in the future as shown in the workflow in section 1. If you are not ready to assess the effectiveness prior to the deadline and want to reschedule, you can choose to “Reopen CAPA” to change the effective date, re. Section : CAPA is Not Effective – Reopen CAPA.
Step 3.1 – Reschedule the assessment – Responsible Person
I. Select the periodic task, under State Transition, click on Reschedule

The scheduling values and the responsible person field in the metadata becomes editable and can be changed only by the responsible person (and process manager). The other fields remain as read-only.
| Field name | Description | Note |
| Interval* | (Time) Interval is default 45 days from the Effective Date of the released CAPA to the due date (Period End Date) of the assessment task. Example: A released CAPA’s effective date is 1 Jan 2023, then due date of the task is 15 Feb 2023. | Read only Reschedule to change. |
| Time Unit* | Time Unit, together with the Interval, reflects the time the Responsible Person is given to assess the effectiveness before the deadline (Period End Date). | Read only Reschedule to change. |
| Time to Complete | Time to Complete determines the date of the Activation Date. It indicates the time (i.e. no. days) before the deadline on, on which an assignment is created and email notification is sent. Example: The Responsible Person is notified 14 days prior to Period End Date (on the Activate Date). | Read only Reschedule to change. |
| Activation Time Unit | Activation Time Unit, together with the Time to Complete indicates the time (i.e. no. days) before the deadline, on which an assignment is created and email notification is sent. | Read only Reschedule to change. |
| Period Start Date* | Equal to the Effective Date of the released CAPA. See Note above table for further explanations. |
II. Assign the values based on your company’s preference of scheduling the assessment
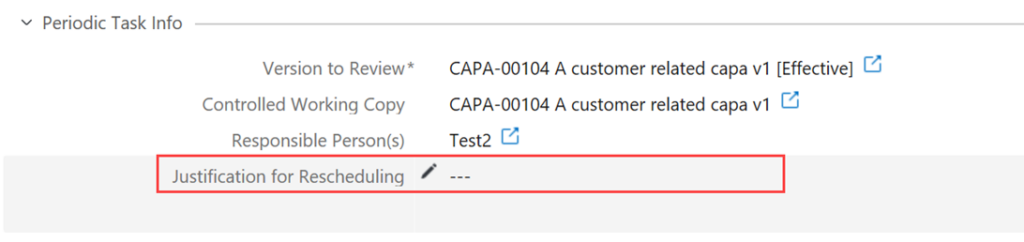
III. Provide a mandatory justification for rescheduling under the Periodic Task Info section
IV. Click on Save
V. Under State Transition, click on Schedule. The dates should be calculated based on the values you set

Step 3.2 – Start the CAPA Assessment – Responsible Person
Once the CAPA is back on Scheduled, the CAPA responsible person can get started with the assessment of the effectiveness.
There are 2 ways to start the assessment:
Option 1: Manually assess the CAPA
When the CAPA is still on scheduled, the CAPA responsible person can trigger the assessment manually at any time before the activation date.
The period end date of the assessment will remain the same even if the assessment was started manually.
I. Select the periodic task
II. Under State Transition click on Assess Effectiveness Now
a. The state will become Pending Assessment, and a task will be assigned to the responsible person and the metadata becomes editable.

III. Refer to the assignment description as a guide

At this stage, the options to proceed with the assessment will be under State Transition.
Option 2: Assess CAPA based on schedule
The CAPA responsible person gets notified on the activation date. On this day, an assignment in SimplerQMS will be generated and an email will be sent to the Responsible Person. The assessment will start and follows dates based on the scheduling values.
I. CAPA responsible persons receives notification that the assessment has reached the activation date and the assessment gets assigned
II. The state will become Pending Assessment, and in the state transition, it will show the options to continue with the assessment.

Based on the option you choose when assessing the CAPA, proceed to
- Section 4: CAPA Effective and Can Be Closed
- Section 5: CAPA is not effective – Reopen CAPA
- Section 6: CAPA is not effective – Close CAPA (I will issue a new CAPA)
Section 4 : CAPA verified and can be closed – Responsible Person
When the CAPA assessment task is moved into “CAPA Effective and Can Be Closed” and the task is signed electronically, the Responsible Person should go to the CAPA (which is now in a version 2 and in Awaits Updates state) and
I. Open (Double-click on CAPA) and complete the CAPA document by finalizing the “Result of Effectiveness Assessment” section in the bottom of the document (or similar based on your Company’s CAPA template)
II. Update the metadata field “Conclusion of Closure” and the “Effective Date” and press save
III. Route the CAPA for review and/or approval and sign it
The assessment is now finalised and the released CAPA (PDF version) will move into either “For Learning” or “Effective” state depending on the Effective Date set. The previous version will automatically be retired. An additional Effectiveness Assessment task will be created but will be marked as “Obsolete Task – Working Copy Closed” as this should not be used.
Section 5: CAPA is Not Effective – Reopen CAPA – Responsible Person
When the CAPA has been assessed as not effective and therefore reopened to ensure actions are taken to make the CAPA effective, please follow the workflow (see also Section 1: Workflow overview):
- Select the task and press “CAPA is not effective – Reopen CAPA”
- Update CAPA with new actions and approve it (covered in this Section 5)
- Find and get started on New Effective Assessment (Section 2 and 3)
- Assess CAPA as effective and close it (Section 4)
Step 5.1 – Assess CAPA as not effective and Reopen CAPA
I. When the effectiveness task is in the state Pending Assessment, click on “CAPA is not effective – Reopen CAPA”

II. Enter electronic signature. After the approval has been captured, the state is “CAPA Is Not Effective – Reopen CAPA” and a version 2 of the CAPA will automatically be assigned to the author, ready for editing


Step 5.2 – Drafting of the new version of CAPA
I. The author checks out the new version of CAPA and start drafting, once completed, save, and check in
II. In the metadata card, update the Conclusion of Closure and Effective Date field. The author can update the content according to the resolution of the CAPA. You will also notice that the Initial Conclusion is not editable

III. Click on Save after filling out the Conclusion of Closure and Effective Date
IV. The CAPA can either be routed for review or approval, this follows the steps in Work Instruction: Managing Quality Documents
V. When all approvals have been captured, it will generate a new PDF version and will retire the previous version
When the new version of the CAPA is in the state “CAPA Pending Effectiveness”, a new periodic task will be generated automatically for the CAPA effectiveness assessment (on the day the CAPA becomes effective)
Now, go to the new assessment task (Section 2), start or reschedule it (Section 3) and assess it again (Section 4 in case it is assessed effective) per Section 1: Workflow overview
Section 6: CAPA is Not Effective – Close CAPA and issue New CAPA – Responsible Person
In the following section, the current CAPA is referred to as CAPA 1 and the new CAPA based on a copy of CAPA 1 is referred to as CAPA 2.
When CAPA 1 has been assessed as not effective and a new CAPA 2 is to be issued, please follow the workflow section 6 (see also Section 1: Workflow overview):
- Select task and click on “CAPA is Not Effective – Close CAPA (I will issue a new CAPA)”
- Update and close CAPA 1 (covered in this Section 5)
- Create CAPA 2 by copying CAPA 1 and follow the CAPA workflow for CAPA 2
- Find and get started on Effective Assessment for CAPA 2 (Section 2 and 3)
- Assess CAPA 2 as effective and close it (Section 4)
Step 6.1 – Mark task as CAPA not effective
I. When the effectiveness task is in the state Pending Assessment, click on CAPA is not effective – Close CAPA (I will issue a new CAPA) and sign it

Step 6.2 – Update and close CAPA 1
I. The author selects CAPA 1, checks out the new version of CAPA 1 to provide input as to why CAPA 1 will be closed and a new CAPA 2 will be created. Once completed, save, and check in
II. In the metadata card, update the Conclusion of Closure and set Effective Date field to today’s date.

III. Click on Save after filling out the Conclusion of Closure and Effective Date
IV. The CAPA can either be routed for review or approval, this follows the steps in Work Instruction: Managing Recorded Issues and CAPAs (Step 3.4)
V. When all approvals have been captured, CAPA 1 will change state to “CAPA Closed”, and a new released PDF version will be created, and the old version will become retired. An Effectiveness Assessment task will be created but will be marked as “Obsolete Task – Working Copy Closed” as this should not be used.
Step 6.3 – Create CAPA 2 by copying CAPA 1 and follow the standard CAPA workflow for CAPA 2
To quickly create a new CAPA 2 and ensure a relations reference is created between CAPA 1 and CAPA 2, then select CAPA 1 and click “Make a Copy of CAPA (using an empty template)”.

This ensures the following information is copied from CAPA 1: Site, Department, Process, Related Recorded Issue (if any), Responsible Person, Author and all Reviewers and Approvers
In addition, a CAPA relation field is automatically added on the CAPA 2 metadata card referencing the name of CAPA 1:

Please process CAPA 2 by drafting, reviewing, and approving it.
For further instructions on drafting, reviewing, and approving a new CAPA (and CAPA Attachments if needed), please review Work Instruction – Managing Recorded Issues and CAPAs
When CAPA 2 has been approved and released, it is time to assess the effectiveness of CAPA 2.
Follow the workflow again via section 2 -> 3 -> 4 (assuming CAPA 2 is assessed effective) in this WI.
Step 6.4 – Finding related CAPAs
Find CAPA 1 while CAPA 2 is selected
Go to the Relations section on the CAPA 2 metadata card. Click on the small blue square with and arrow or search for the document ID.
Relations -> Metadata card

Find CAPA 2 while CAPA 1 is selected
Go to Detail Listings -> Docs to find the CAPA here or expand the details on CAPA 1 and look for CAPA 2 under Documents
