Purpose
Learn how to:
- Create and convert a document into a Multifile document
Expected Outcome
- Users are equipped to handle Multifile documents in SimplerQMS
Prerequisites for all
- Must be logged in to SimplerQMS
- Must be a member of one of these ‘User Groups’ to view records:
- All internal and external users
- Must be a member of one of these ‘User Groups’ to create new records
- All Contributors
Section 1: Creating a Quality Document
Step 1.1 – Create a Quality Document – Initiator / Author (All Contributors User Group)
There are multiple ways to create a document in SimplerQMS:
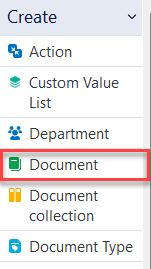
I. On the left side of the screen, expand Create and click on Document
ii. Click on the Create (+) next to the Home Tab and choose Document from the dropdown list
iii. On the left side of the screen, expand Create and click on Document
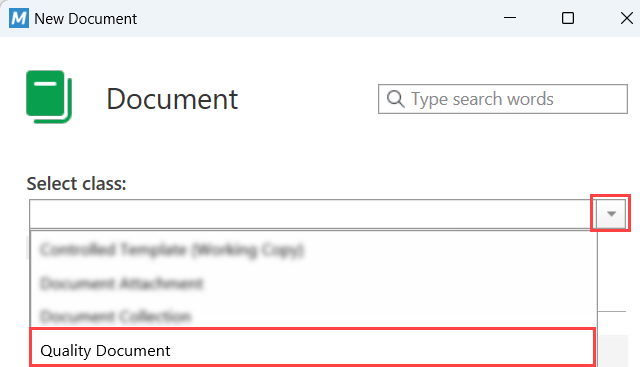
II. To create a quality document from this selection, you need to define the Class as Quality Document
III. Select the right template
A Metadata Card will pop up.
Step 1.2 – Fill in the Metadata Card
| Field name | Description | Note |
| Short Title* | Title of the document | |
| Site(s)* | The legal entity that the document is tied to | |
| Document Type* | Select the appropriate document type; The selection of the document type determines whether the quality document requires a Change Request or NOT | |
| Department* | Select the appropriate department | |
| Process* | Select the process that the document belongs to | |
| Responsible Person(s)* | The person assigned to a specific document with broader access rights and responsible for periodic review if the document type requires it | |
| Author(s)* | Person that drafts/authors the document | |
| Reviewer(s) | This is optional if a review is needed for the document | |
| Approver(s) | Person assigned to approve the document, which is needed for its release | |
| Due Date | When a due date is set, the system will send out automatic notifications to the Responsible Person, author, and 3 days before the due date. | |
| Relation(s) | An object or properties in the system that you can relate the document with. E.g., Related to Person |
II. Click create after filling out all necessary information on the metadata card
III. Working copy of the new quality document launches in Word (or in any applications the document is initiated)
IV. Modify or draft the content of the document if needed
V. Save and check in the document and go back to SimplerQMS
a. The document will be in the state “New Preliminary Document”, and it should be assigned to the document author and the document ID.
Section 2: Converting to Multifile
Step 2.1 – Convert a quality document to Multifile – Author
For you to convert the quality document into a Multifile:
I. Select the document you created.
II. Right click and choose “Convert to multifile”

III. The Microsoft Word (or similar software) icon on the document you created will now be replaced by the multifile icon which looks like a green binder.

Step 2.2 – Add a record to the Multifile – Author
I. Select the file or documents you wish to add, drag & drop the selected files on top of the multifile document with the green binder icon.
a. The file you add can be in any supported format.

II. The metadata from the original single file is shared across all added files.
a. You can double click on the green binder/multifile, or you can click on the small grey arrow to expand it

b. Files within the multifile will be visible
c. Authoring can be done in each document if the uploaded file is in an editable format

Section 3: Routing the Multifile for Review or Approval – Author
Once you are done authoring the content of the documents you can either click on “Route for Review”, “Route for Approval without Review” or “Not Current – Archive”

Select the multifile on your Assigned to Me and under State Transition
I. Choose “Route for Approval without Review” if you have not assigned any reviewer or the multifile need not to be reviewed anymore.
a. To route the multifile for approval, “Effective Date” in metadata should be set.
b. If the effective date is set to present, once the multifile is released it will go to an “Effective” state.
c. If the effective date is set in the future, once the multifile is released it will go into “For Learning” state. This is only a general system status and by default does not have anything to do with learning rules. Refer to Work Instruction: Managing Training and Learning if a learning rule needs to be set on the multifile.
II. Choose “Route for Review” if you assigned a reviewer or the multifile needs to be reviewed
III. Choose “Not Current-Archive” if you decided not to continue with the multifile you created and would like to discard it.
Section 4: Approving or Rejecting the Multifile
The approver will receive a notification that the multifile is ready for approval. As the approver, you will have an option to either approve or reject the document under State Transition.
Step 4.1 – Release Multifile Document – Approver
I. Select the multifile on your Assigned to Me
II. Under State Transition, click on “Approve Document”

III. Enter your electronic signature
a. The system will generate the released copy of the multifile after all the approvals are captured along with the documents you have included with in.
IV. Click on the expand arrow of the multifile to see the “Released Versions”
V. An effective version will be created.

VI. Rejecting the multifile will route it back to “New Draft” state and it will be assigned to the Author. Refer to Section 3.2

Step 4.2 – Make Effective Immediately – Responsible Person
If the effective date is set in the future, once the multifile is released, the released version will go into “For Learning” state.

If the multifile document needs to be released immediately, the Responsible Person can make the multifile effective immediately. Click on “Make Effective Immediately” under State Transition – this will require electronic signature

Once “Make Effective Immediately” has been selected the system will generate the effective version of the multifile.
Section 5: Routing the Multifile for Update or Retirement
As the Author of the Multifile you can route the multifile for update, while the Responsible Person can route it for update or retirement.
I. Select the multifile (you can either search it using the short title, ID number or find it through the All Documents view)

II. To update the multifile to a new version, select “Route for Update”
a. This will also allow you to add more files on your multifile. In this sample case we added a Template.

b. This also means that you will have to follow the same flow from drafting, authoring, reviewing, and approving it as described in the previous sections. Refer to Section 3.2 onwards.
III. To retire the multifile, select “Route for Retirement”
a. Enter your electronic signature
b. Set the retire date in the metadata

c. Under State Transition, press “Submit Retirement Date”

d. Multifile will now update its state into “Controlled Document Retired”

e. The released version state will now become “Document Retired”
