Purpose
Learn how to:
- Work with Actions, Periodic Tasks and Reminder Rules in SimplerQMS
Expected Outcome
Users are equipped to handle Actions, Periodic Tasks and Reminder Rules in SimplerQMS
Prerequisites for all
- Must be logged in to SimplerQMS
- Must be a member of one of these ‘User Groups’ to view records:
- All internal and external users
- Must be a member of one of these ‘User Groups’ to create new records
- All Contributors
Section 1: Comparison of Task and Action features
The table below provides an overview of the key differences between the Action and Task features. You should ask yourself if it is a recurrent or one-time assignment and if it should be assigned on a specific date or by a released document.

Section 2: Actions
Watch this short video to understand how the Action feature works in SimplerQMS:
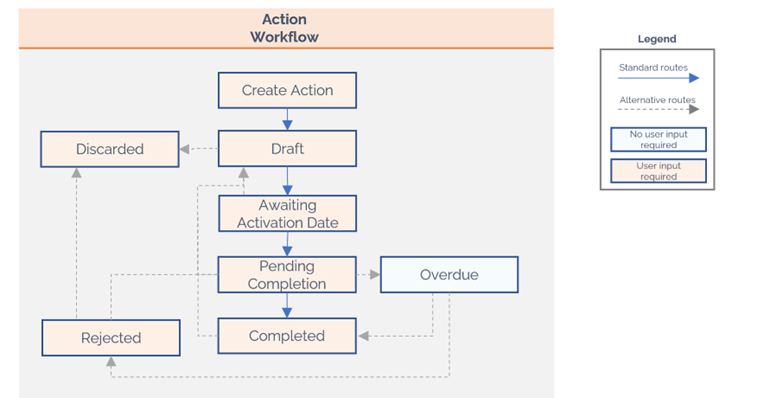
The below workflow presents how actions can be processed in SimplerQMS:
Step 2.1 – Create an Action
Actions are used to appoint yourself or someone else in the organization to carry out a task that can be tracked via the completion of the action from the Assignee in SimplerQMS. Actions can be created as a standalone, not related to other records or on any record in any state.
Actions are configurable on signature and completion requirements and can be assigned to multiple Assignees. They also have a Responsible Person which ensures they will never go unseen, even if rejected. Dates can be set for when you would like the action to be Assigned and Due.
Option 1: Create a standalone Action – Initiator
There are multiple ways to create an Action in SimplerQMS:
I. In the Create New section, on your Home Tab, click on Action.
ii. Click on the Create (+) next to the Home Tab and choose Action from the dropdown list
iii. On the left side of the screen, expand Create and click on Action
A Metadata Card will pop up.
Option 2: Create Actions through a Shortcut – Initiator
Creating Actions through shortcuts will automatically relate it to an object such as documents, suppliers, customers etc. In this example we will create an Action for a document.
I. Select the document and click “Create Document Action” in the Task Area under Actions
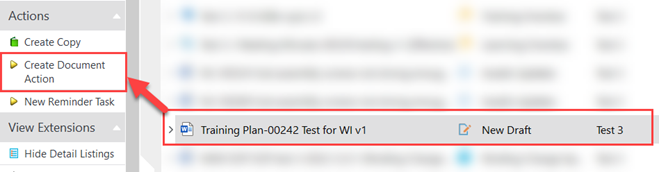
II. A metadata card will pop up
a. Since the actions is created via shortcut from Task Area, an automatic relationship will be established between the document and the action

Step 2.2 – Fill the metadata card
Part 1: Action Information
| Field name | Description | Note |
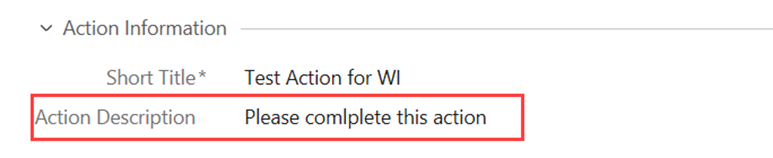
| Short Title* | Title of the Action – a short description of the task to be done or the name of the related item for easy identification | |
| Action Description | Explain in detail what task is to be carried out | |
| Assignee Comment | This field is to be completed by the Assignee(s). It is not a mandatory field to fill, unless the Assignee will reject the Action. | It is important to outline in your procedures if this is a field that should always be used. |
| Responsible Person* | The person in charge of the action and ensuring that all requirements are properly outlined in the action metadata. The responsible person will send out the actions to Assignee(s) once the draft is completed. If Assignee(s) reject the Action, it gets reassigned to the RP who will need to ensure that the rejected action is properly handled. | Refer to Step 1.6 |
| Assignee(s) | Only mandatory once trying to Submit by the Responsible Person. | You can assign multiple users |
| Mandatory for All* | If yes – in case of multiple assignees, all will have to complete before the action is considered completed If no – Even in case of multiple assignees, only one will have to complete to consider the action completed | The combination of these 2 fields creates 4 potential outcomes. The workflow changes accordingly, which you will be able to see in the next few steps. |
| Requires e-signature* | If yes – completion of the action will require signing with electronic signature If no – completion does not require electronic signature, only a state transition by the Assignee(s) | The combination of these 2 fields creates 4 potential outcomes. The workflow changes accordingly, which you will be able to see in the next few steps. |
| Site* | The legal entity the action is related to |
Part 2: Relations
| Field name | Description | Note |
| Affected Process(es) | Processes that the action is linked to | |
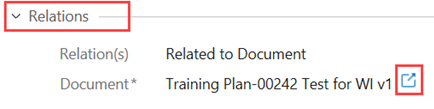
| Relation(s) | In this field you can define what category of items you wish to relate the action to. Based on your selection individual fields will be populated on the metadata card where you can define the specific item the action is related to within SimplerQMS | Leaving this field empty will still create a functional Action. |
| Field(s) based on Relation(s) | There can be as many different relations as you would like. When Using shortcuts from the Task Area, these relations are often filled by default. It is recommended to always keep the default fill and add additional relationships where you see fit. | In the case of related CAPAs or CRs, completion of the Action is required before the CAPA or CR can be closed. |
NOTE: Action can be used for tracking completion of action items outlined in your CR Plan or CAPA Action Plan. Ensure that the relationship is added on the Relation(s) field.
These actions will need completion before you can move to the final approval of a Change Request or CAPA.
Part 3: Action Dates
| Field name | Description | Note |
| Due Date* | Default will always be the date of creation. You can reset the Due Date to match the expected deadline. | Having the default setting will assign the Action with expected immediate completion. |
| Grace Period* | By default 0 Business Days. The combination of these two fields will define how much time you allow for the completion of the Action. | Having the default setting will assign the Action with expected immediate completion. |
| Grace Period Unit* | By default 0 Business Days. The combination of these two fields will define how much time you allow for the completion of the Action. | Having the default setting will assign the Action with expected immediate completion. |
| Activation Date | Automatic Value. The date when the Action is first assigned to the Assignee(s) after the Responsible Person submitted it. Calculated based on the Due Date and Grace Period. Due Date – Grace Period = Activation Date | 2023-03-15 – 2 Business Days = Activation date 2023-03-13 |
| Date Completed | Automatic value of completion date | |
| Date Rejected | Automatic value of rejection date |
Part 4: Assignee Information
| Field name | Description | Note |
| Rejected By | Automatic value of name of assignee who rejected the Action | These fields are used for tracking the Action through its life. They will change according to what has already happened to the Action. |
| Remaining Assignees | By default 0 Business Days. The combination of these two fields will define how much time you allow for the completion of the Action. | These fields are used for tracking the Action through its life. They will change according to what has already happened to the Action. |
| Completed Assignees | Automatic value of all assignees who have already completed the Action | These fields are used for tracking the Action through its life. They will change according to what has already happened to the Action. |
When you have filled all the necessary fields, click Create.
The action will be created in the state Draft. It will also receive a unique ID from a number sequence starting at 01 (separate ID sequence from documents).
Potential configurations of actions:
The different configurations are part of the Pending state names of Actions
- Mandatory for All & requires e-signature
- This action will need completion by all Assignee(s) and will prompt for e-signature for all
- Mandatory for All & no e-signature
- This action will need completion by all Assignee(s) but will not prompt for e-signature
- Not Mandatory for all & requires e-signature
- This action will only need completion by one of the Assignee(s) and will prompt for e-signature for the individual completing it
- Not Mandatory for all & no e-signature
- This action will only need completion by one of the Assignee(s) and will not prompt for e-signature for the individual completing it
For this WI the option followed will be “not Mandatory for all & requires e-signature”. Whenever differences in the workflow are present, they will be pointed out via notes.
Step 2.3 – Action on Draft – Responsible Person
Once the action is created it will be assigned to the Responsible Person in a Draft state. The aim of this state is to ensure that all necessary metadata is correctly filled and ready for submission. The metadata is fully editable at this point.
After reviewing all the Action information, especially the fields like Description, Assignee(s), Mandatory For All, Requires e-signature and the Action Dates, as the Responsible Person:
I. Click on Submit
a. Submitting the Action will assign the action to the Assignee(s)
b. An option to discard the action is also available in case you have created it on accident and would like to get rid of it without assigning it to the Assignee(s)

This step is the same across all action types, regardless of the configuration you have chosen on Mandatory For All and Requires e-signature fields.
Depending on the settings under Action Dates, the action will either immediately assign to the Assignee(s) in state “Pending (combination of configurable choices)” or go on Awaits Activation Date. In the Pending state the Action is Assigned to the defined Assignee(s), while in Awaits Activation Date the action is not assigned to anyone.

In all cases of configuration, the Responsible Person still has access to view the actions and is allowed to send them back to draft at any point. The metadata is locked for editing.

In Awaits Activation Date the metadata is still editable for the Responsible Person and the action can still be discarded. To Discard a pending action, it will need to be moved back into Draft.

If the Action needs to be modified and sent out earlier than the previously set Activation Date, then the Due Date or the Grace Period will need modification. The Responsible Person does not need to send the Action back to draft.
I. Modify the metadata
II. Save the metadata card changes
Once saved, the action will change state to Pending and the metadata will be locked.
Step 2.4 – Complete the Actions – Assignee(s)
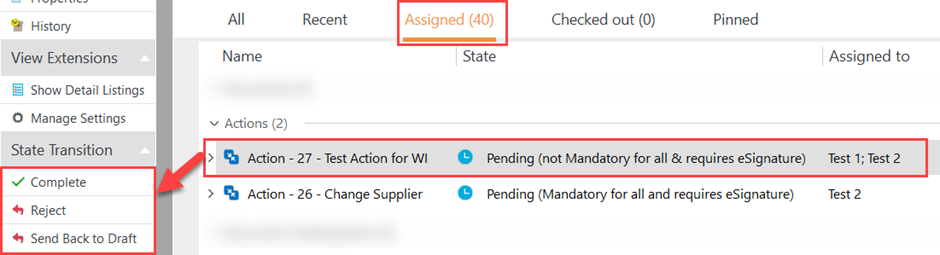
The assignee(s) will be notified about the Pending Action. The action will be present under the Assigned tab.
When an Action is assigned to you, the primary task is to read the Action Description to understand what it is that needs completion.
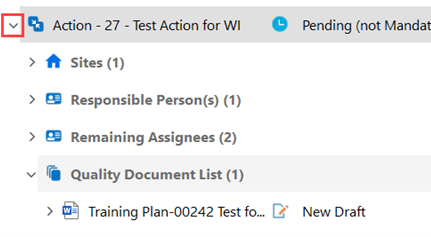
In case you Action is related to any item within SimplerQMS you will be able to locate that under Relation(s) and can directly access it by clicking on the blue icon next to the reference or by expanding on the Action record and locating the related item:
or
Once you have completed the outlined action description, as an Assignee you will have the following options when selecting the Action:
I. Complete – this option does not require an Assignee Comment, but it is recommended to follow up on your internal procedure
a. When no e-signature is required, clicking on Complete will mark the completion of the Action without any further action
b. When e-signature is required you will be prompted to sign in using your login details to provide your signature
NOTE: Completing the Action will not mean that you task is completed.. The Action does not automatically carry out any task for you, it is only used for the tracking of action items assigned to you.
II. Reject – this option will require an Assignee Comment
a. This option is available in case you have received an action that you do not feel competent to complete. When rejecting an action Assignee Comment will need to be provided on the metadata. The system will prompt for it with an error message

III. Send Back to Draft – this option does not require an Assignee Comment, but it is recommended to follow up on your internal procedure.
a. Select this option if you feel there is not enough information provided to know what to do with the Action
NOTE: Under the pending state of “Mandatory for All” actions the Responsible Person has the option to Close Action Immediately.

This option is available in case there are multiple assignee(s) but one or more cannot complete their action on time (due to absence). In these situations, if deemed acceptable, The Responsible Person can close the action immediately and not wait for the remaining Assignee(s). Please consult your own procedure before proceeding.
Step 2.5 – Rejected Actions or Routed back to Draft – Responsible Person
Once an action is rejected it gets reassigned to the Responsible Person.
I. Read the Assignee Comment field in the metadata and check the Assignee Information to see who rejected the action:


Based on the comment received, consider your two options under State Transition:
II. Discard
a. If you no longer wish to have this action carried out by anyone
II. Send Back to Draft
a. This way you can edit the metadata again and re-submit the action. Consider changing Assignee(s) or expanding the Action Description to provide additional detail
If you wish to reassign and Send Back to Draft, ensure that you make the necessary adjustments on the metadata. It is also possible that the Assignee(s) sent the Action back to draft themselves. In either case, you will have the option to Submit the Action again after providing the required clarification.

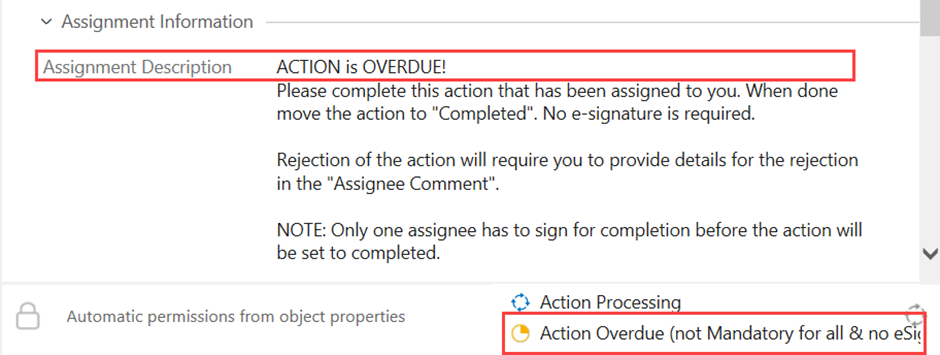
Step 2.6 – Overdue Actions
Once the Due Date is surpassed, Actions will become Overdue. This notifies the Assignee(s) and the Responsible Person as well, to ensure that the action is dealt with as soon as possible.
Follow Step 1.4 for completion.
Section 3: Periodic Tasks
Periodic tasks are used for repetitive tasks. The use case of a periodic task that is created as a standalone element is to set up reminders for yourself that a template, supplier contract or other record should be reviewed on a set schedule. For documents on document types that are set to require periodic review, periodic tasks will be generated automatically. Refer to Section 3 to read more.
Step 3.1 – Create a standalone Periodic Task – Initiator
There are multiple ways to create a Periodic Task in SimplerQMS:
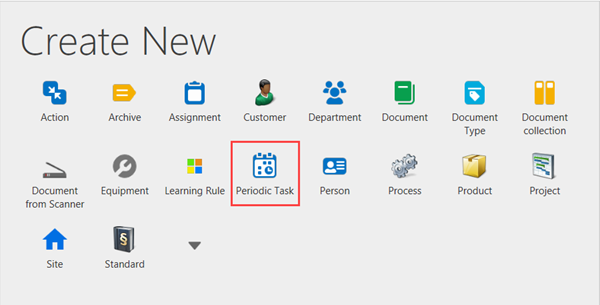
I. In the Create New section, on your Home Tab, click on Periodic Task.
II. Click on the Create (+) next to the Home Tab and choose Periodic Task from the dropdown list
III. On the left side of the screen, expand Create and click on Periodic Task
IV. A Metadata Card will pop up.
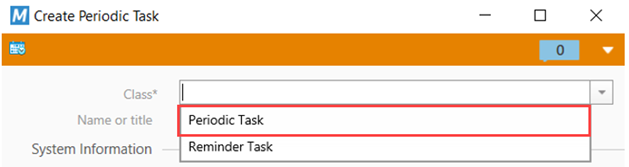
V. Click on the drop-down arrow and you choose Periodic Task.
To learn about Reminder Rules, refer to Section 4.
Step 3.2 – Fill the metadata card
Part 1: Periodic Task Information
| Field name | Description | Note |
| Short title* | The title of the Periodic Task | |
| Responsible Person* | The person who will get the periodic tasks assigned for evaluation once the activation date is reached. | |
| Description* | A description of the Periodic Task | |
| Relation(s) | An object from the system that is related to the Periodic Task – This will be the common denominator between the periodic tasks that are created. Once a PT has been completed, a new one gets created and tied to the same relation. | Multiple Options applicable |
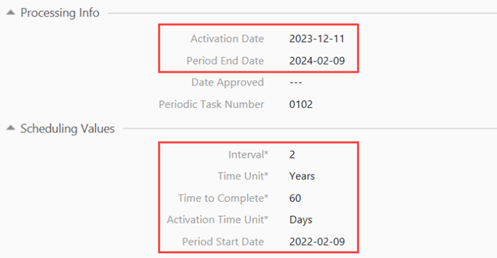
| Activation Date | This field will be filled based on the Period End Date and the value set in the “Time to Complete + Activation Time Unit” fields. This is the date when the Periodic Task will be assigned to the Responsible Person for review. | |
| Period End Date | This field will be filled based on the “Period Start Date” field and the value set in the “Interval + Time Unit” fields. This is the date by which the Periodic Task will need to be finished. | |
| Interval* | The span of time between the start date and end date, which refer to the value of time unit | In case of an automatic assignment, the System Default – 2 |
| Time Unit* | Refers to the value of Interval (Year, Month, Week, or Day) | System Default – Years |
| Time to Complete* | The calculated time to complete the task. Refer to values of activation time unit | System Default – 60 |
| Activation Time Unit* | Refers to the value of time to complete (Years, Month, Week, or Day) | System Default – Days |
| Period Start Date | Depending on this value, the Periodic task dates will be populated. |
When you have filled all the necessary fields, click Create.
If the Period Start Date is in the future, the task will automatically be set to state “Scheduled” and will be assigned to the RP when the activation date kicks into action.
Step 3.3- Complete the Periodic Task – Responsible Person
I. Select the task
II. Click “Completed” in the Task Area
III. Sign using your electronic signature

The task is completed, and it is removed from the Assigned to Me section. The state will change to “Closed” and no further actions can be carried out.
A new periodic task will be scheduled with the same name, but a different ID. If you have set up relations to for e.g., a supplier, then you can see that the new periodic task will be tied to the same relation.

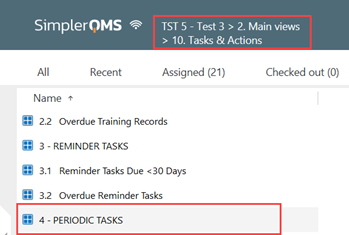
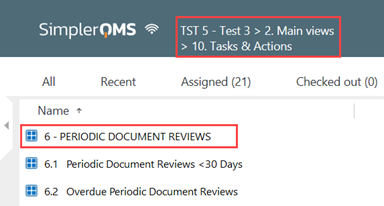
If the periodic task is free-standing and not connected to other properties, but you would like to reschedule or resolve it sooner, you can find it by navigating to the Main Views, then Tasks & Actions, then Periodic Tasks.
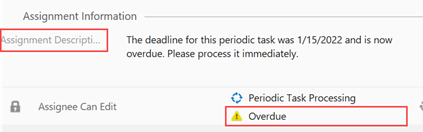
NOTE: Periodic Tasks and Periodic Document Reviews past due date (Period End Date) become Overdue. The assignment description will always point out the exact due date.
Step 3.4 – Complete a Periodic Task ahead of schedule – Responsible Person
In the state “Scheduled”, a periodic task can be completed before its scheduled start date.
I. Navigate to the Periodic Tasks view
II. Select the periodic task you would like to complete
III. Click “Complete Task Now” under State Transition
a. This is also the way to “Disable Task” which will disable the current task and discontinue the creation of future tasks.

Step 3.5 – Reschedule the Periodic Task – Responsible Person
When a task is in state “Pending Completion” you can reschedule it by clicking Reschedule under state transition.

Once clicked, the Scheduling Values section of the metadata card becomes editable, and you can set new values in the fields. The values set will determine the new Period End Date and Activation Date.

When done, click on “Scheduled” under State Transition.

NOTE: Periodic Tasks and Periodic Document Reviews can also be rescheduled on a per instance basis. If you wish to have a new schedule on the next instance, change the scheduling values in “Pending Completion” state and complete the current task.
Section 4: (Automatic) Periodic Document Review
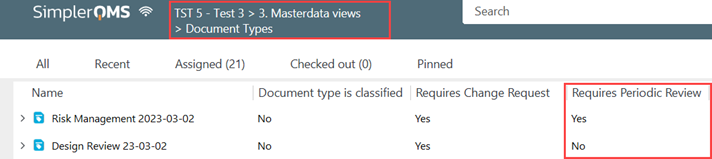
Periodic Tasks are automatically generated on Released and Effective documents that are running on a document type that requires Periodic Review. ONLY a Metadata Administrator can create and define the Document Type properties.
Periodic Tasks that are automatically generated for document review will be running on the Class “Periodic Document Review”. To see a full list of both active and inactive document reviews, navigate to Main Views, then to Tasks & Actions, then Periodic Document Reviews.
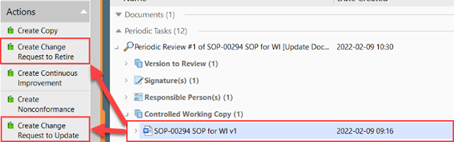
To find a periodic review directly related to a document, look for the document you wish to review, then expand using the small grey arrow on the left side and find the Periodic Tasks section.

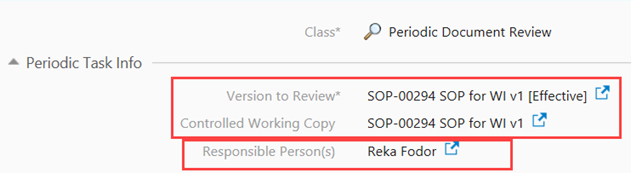
The Responsible Person is assigned from the responsible person of the quality document.
The periodic task will always have a reference to the document it is initiated from so you can easily find which version needs to be reviewed.
Step 4.1 – Reschedule a Periodic Document Review – Responsible Person
On such periodic reviews, the scheduling values are system generated and are set by default to 2 years and will notify the responsible person 60 days before the period end date. The period start date is based on the date of document approval.
The state of the periodic document review will be “Scheduled” until the activation date is reached. In this state, scheduling values can be modified (e.g., if the 2 years, 60 days is too long):
I. Click on the Periodic Document Review you wish to reschedule
II. Click on “Reschedule” under State Transition
III. Reschedule will make scheduling values editable on the metadata. Change these values according to your organizations agreed values

IV. Click on “Scheduled” under State Transition to apply these values
a. A new Period End Date and Activation Date will be calculated by the system
Step 4.2 – Complete a Periodic Document Review – Responsible Person
When the activation date is reached on a periodic document review, it will go into state “Pending Completion” and will be assigned to the responsible person. The user is presented with two options. The decision between these options is based on the quality document that is tied to this periodic review.
The document can be opened directly from the periodic task in Assigned to Me:
I. Click on the Periodic Review
II. Click on the expand arrow on the left side
III. Find Versions to Review
IV. Open the document and decide what action needs to be taken.

Option 1: Review Completed – No Changes Needed
If you deem that the document does not require review:
I. Click on the periodic review
II. Click on “Review Completed – No Changes Needed”
III. Enter your electronic signature

A new periodic review will be created for the same document inheriting the scheduling values of the original periodic review.

Option 2: Changes Needed (Update or Retire)
If you deem that the document needs updates or has to be retired:
I. Click on the periodic review
II. Click on “Changes Needed (Update or Retire)”

III. In state Changes Needed (Update or Retire) you can choose between sending the document for updates or retiring the document

IV. In the metadata card of the periodic review, you need to fill in the “Justification of Decision” field
a. Here you need to describe why you have made the choice to either update or retire the document

V. Click on the option that suits your need
VI. Enter your electronic signature to confirm your choice
A. On documents that run on a document type that requires a Change Request, navigate to the working copy and create a new Change Request or add the document to an existing Change Request to either update or retire.
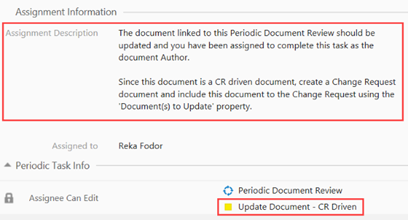
Refer to Work Instruction: Managing Change Request to continue.
B. On documents that do not require Change Request, the document to update will automatically be routed into a new major version for updates and get assigned to the author of the document.
a. Alternatively, if “Retire” is pressed it will automatically become retired. In case the document is run on a change request, a Retire Request will need to be raised to complete the retirement.
The state of the periodic review will change based on your choice:


VII. If update is chosen in both option A or B, once the update process is done a new periodic task will be scheduled automatically, inheriting the scheduling values from the previous periodic task.
If the document has a future effective date, the periodic review will only be created once the document becomes effective

VIII. If a document is retired, all previously resolved periodic reviews will become obsolete and no new periodic review will be created
Step 4.3 – Complete a Periodic Document Review ahead of schedule – Responsible Person
In the state “Scheduled”, Periodic Document Reviews can be completed ahead of the planned schedule. In the case that you would like to review a document early and end the periodic review tied to it:
I. Click on the Periodic Document Review you wish to complete
II. Click on “Review Now” under State Transition
III. Follow the instructions in Step 3.2

Section 5: Reminder Tasks
Reminder tasks are used strictly on the documents that are under the class Quality Document (that includes Multifile documents as well). Their intended use is to create any kind of reminder that should be tied to a document, e.g., if you update a Work Instruction in SimplerQMS that has a printed copy for use on a production floor (outside the system) and you would like to be reminded to update the printed copy when you made any updates within the system.
Step 5.1 – Create a Reminder Task – Initiator
You can set up reminder tasks as early as in the “New Preliminary Document” state of a document, until the document has been approved. If you did not add a reminder to version 1 of the document, but you wished to do it, route it for an update and add a reminder to version 2.
When you create a Reminder Task you can create it through the Create options described in Section 2, except for step V, where you should choose Reminder Task as Class instead.
The recommended option is to use the document shortcut “New Reminder Task” under Actions in the Task Area of a Quality Document. To do this:
I. Select the quality document you wish to add a reminder to
II. Click on “New Reminder Task”

A Metadata Card will pop up.
Step 5.2 – Fill the metadata card
Part 1: Reminder Task Information
| Field name | Description | Note |
| Short title* | The title of the Reminder Task | |
| Document to Remind* | If created through Create button: · Select the document (s) that needs a reminder If added through Actions: · Field is automatically set to the selected document | Please see tooltips of Reminder Task on metadata card |
| Responsible Person* | The person who will be reminded about this task | |
| Repeatable Task | By default, this box is ticked to create a recurring reminder that will be created every time the document is updated. If you wish to create a single use reminder, untick this box. | |
| Description* | Define what actions needs to be taken when this reminder is assigned to the RP | |
| Grace Period | Number of days you would allow for the completion of this reminder task. | |
| Grace Period Unit | Defined in days | |
| Due Date | The date is based on the combination of the values set as your Grace Period and the effective date of the Quality Document. |
Step 5.3 – Verify that the Reminder Task is created – Initiator
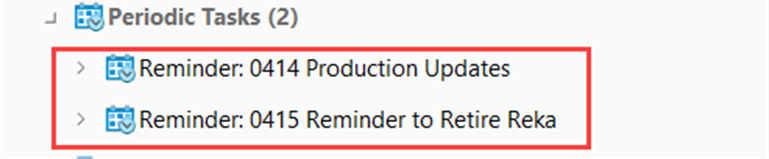
I. Click the expand arrow on the document where you set the Reminder Task.
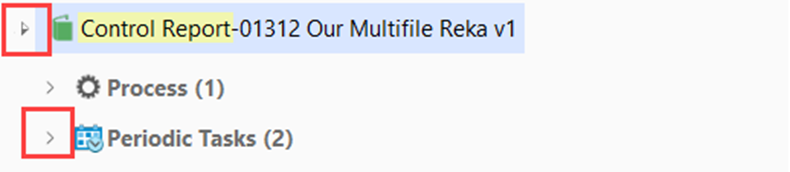
II. Find the Periodic Task section and click the expand arrow
III. All current and past reminders will be shown.
Step 5.4 – Complete the Reminder Task – Initiator
Once the document is released, you can complete the Reminder Task before the generated due date:
I. Select the Reminder Task, click on “Task Completed” under State Transition

II. Enter your electronic signature
III. When the task is completed, the State will change to Task Completed and the reminder is no longer assigned to the Responsible Person
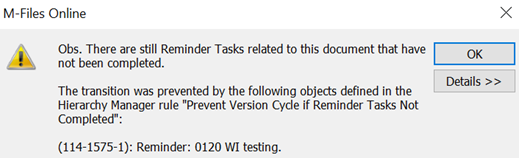
NOTE: Routing a document for an update with an open reminder task is not possible. The following error message will pop up and show which reminder is currently open to be done before moving forward. This is not applicable on retiring the document.
Step 5.5 – Retire the Reminder Task – Initiator
The reminder task can always be retired, even before the document you created it for is released.
I. Select the Reminder Task, click on “Retire Task” under State Transition

II. Retiring the reminder does not require an electronic signature
III. Retired reminders cannot be set to active again and no more actions will be available
NOTE: Retiring the related document to the reminder will not retire the reminder automatically.