This work instruction is only for the onboarding of new users in SimplerQMS and offboarding users.
Purpose
- Provide guidance on how to set up new users in SimplerQMS.
- Provide guidance on how to deactivate users in SimplerQMS.
Expected Outcome
- Organized onboarding and offboarding instructions in SimplerQMS
Prerequisites
- Access to the company Azure Active Directory – to create/ remove user.
- Access to SimplerQMS with user groups All Contributors, Training Manager and Human Resources – documentation, training
- New User access with at minimum Read & Sign (for Read & Sign license) or All Contributors (Concurrent + Named License) User Groups
Overview of Responsibilities
| Step | Task | Owner |
| 1 | Before new user starts | Employee Manager/HR/IT/QA |
| 2 | New user’s first day of use of SimplerQMS | User/Training |
| 3 | Offboarding user | Employee Manager/HR/IT |
Step 1 – Before a New User Starts
Step 1.1 – Access Request Form
I. Employee Manager/HR/IT/QA confirms that a new user should be set up in SimplerQMS
a. Create an access request document based on the access request template implemented in the system; the template was first established at the beginning of SimplerQMS implementation. If there was no template, reach out to SimplerQMS team for guidance.
b. Access request form should contain; Log in information (except the password), user groups, Sites, training groups, projects & classified document types if there are any.
c. Employee Manager/HR/IT/QA sends the access request document to the person responsible for creating users in Azure Directory.
Step 1.2 – Create User in Azure Directory
I. Azure Directory responsible receives the access request document for the new user.
II. Follow the instructions on how to add users in Azure: https://www.simplerqms.com/knowledge-base/creating-new-users-in-azure/
III. Notify the Employee Manager/HR/IT/QA that the user has been added to Azure according to the access request document.
Step 1.3 – Update New user in M-Files
I. The Employee Manager/HR/IT/QA notifies SimplerQMS to assign a license to the new user.
Note: For some customers with concurrent license, the new users are set to a default concurrent license which is set up in Azure, if there is no concurrent license in your company or if concurrent license is not the license to assign to the user, reach out to SimplerQMS.
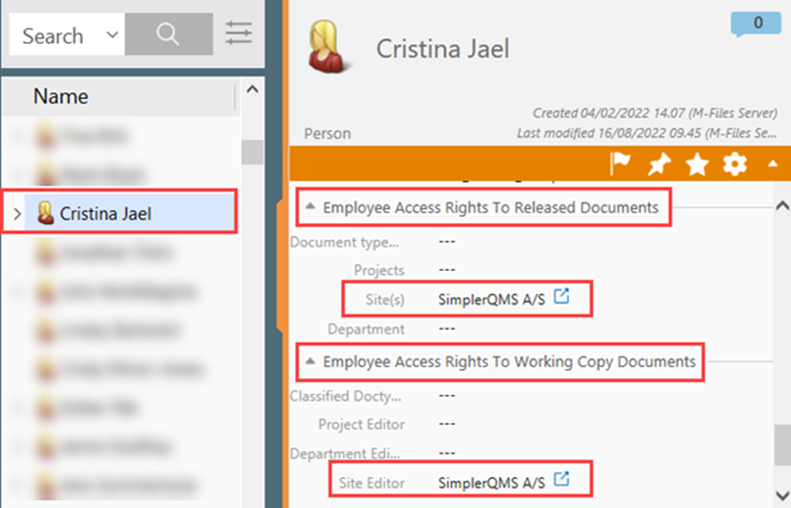
II. The Employee Manager/HR/IT/QA (with Human Resource user group) assigns the Site (in both working copy and released documents). It is advised that the Site access is only modified during off hours as the permissions recalculate for all the users on all documents when a change is made.
III. The Employee Manager/HR/IT/QA (with Human Resource user group) assigns the Project and/or Classified Document types, if there are any.
IV. The Employee Manager/HR/IT/QA (with Human Resource user group) assigns the training groups to the new user. Once the training groups have been assigned, the learning records should start to assign to the new user automatically.

Note: The new user will appear in M-Files 15 to 30 minutes after they were created in the Azure Active Directory.
Step 1.4 – Prepare Electronic Signature Agreement
I. The Employee Manager/HR/IT/QA creates an electronic signature agreement document based on the electronic signature agreement template implemented in the system. The template was first established at the beginning of SimplerQMS implementation. If there was no template, reach out to SimplerQMS team for guidance.
II. Print a copy of the electronic signature agreement and ask for a written signature from the new user.
Step 1.5 – New user signs Electronic Signature Agreement
I. The new user receives a hard copy of the electronic signature agreement.
II. Signs the document with and returns the document to the Employee Manager/HR/IT/QA
III. Employee Manager/HR/IT/QA create a scanned copy, drag and drop it onto the original ESA document within SimplerQMS associated to the user and send for approval.
a. It is advised that the ESA document also gets approved (signed) in SimplerQMS by the new user, so their electronic signature is also present on the document with their physical signature.
Section 2: New user’s first day of use of SimplerQMS
Step 2.1 – New user’s access in SimplerQMS
I. The Employee Manager/HR/IT/QA shares the following information to the new user
a. Email and password to access SimplerQMS
b. Installation instructions for the Production Vault:
For Windows: https://www.simplerqms.com/knowledge-base/installing-simplerqms-m-files-on-windows-and-adding-production-vault/
c. Vault connection server name (can be found in M-Files Desktop settings on a computer with M-Files installed for Windows or for Mac, access the vault using Chrome and share the link to the new user)
II. The new user receives necessary information to acquire access in SimplerQMS
III. Use the log in information shared by the Employee Manager/HR/IT/QA. The new user should now have access to SimplerQMS.
IV. Approve the Electronic Signature Agreement if assigned using the login information
Step 2.2 – New user reads and signs learning records
I. New user starts receiving notifications about the training records, reads the documents and signs electronically.
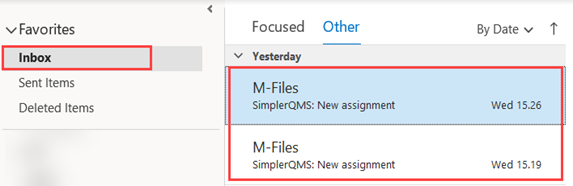
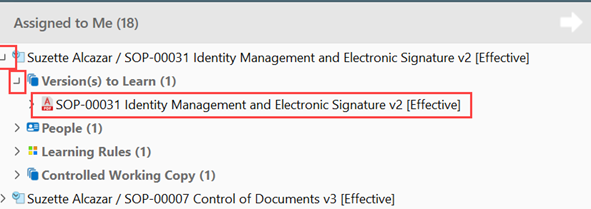
II. The learning records can be found in the Assigned section of SimplerQMS

a. Click the expand arrow to see the Versions to Learn
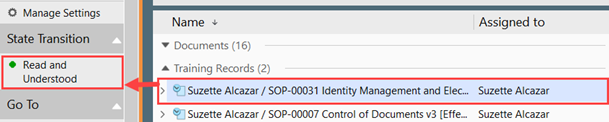
b. Once you are done reading the document, click on the assignments (Training Record) and click “Read ad Understood under the State Transition
Note: To know more about Training Records refer to Section 3, 4 & 5 of this link: https://www.simplerqms.com/knowledge-base/managing-training-and-learning/
Section 3 – Offboarding a User
Step 3.1 – IT Department Notification
I. Manager notifies IT that user is leaving to ensure that the access rights of the departing employee will be revoked on the last working day
II. IT deactivates user in the Azure AD on the last working day
a. The minimum requirement is to set the user as Disabled

Step 3.2 – SimplerQMS A/S Notification
I. Notify SimplerQMS A/S to remove the license from the departed user
Step 3.3 – Human Resource
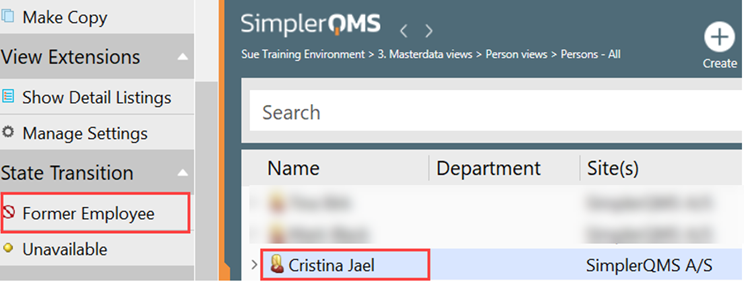
II. The Employee Manager/HR/IT/QA (with Human Resource user group) of the company sets user to “Former employee”
a. This happens automatically if the IT has changed the user to Disabled, but it is important to be verified by the HR User
Step 2.3 – Reassigns tasks to an active user
If the departing user has documents or tasks assigned and still on editable state, follow the steps below to reassign these documents or tasks to an active user
I. The metadata administrator should reassign Responsible person or manager to objects such as departments, sites, processes, document types etc., to an active user.
II. Check any documents that are still on editable state if assigned to the former user, ensure that it will be reassigned to an active user
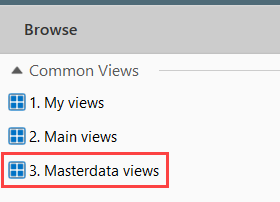
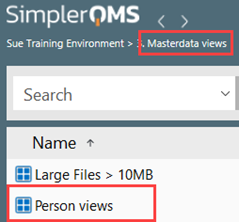
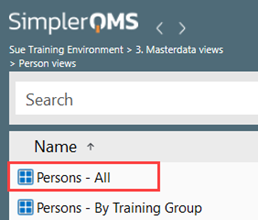
a. Go to Masterdata Views, double click to open, then select the Content Views and Content by Person (Current Only)
b. Select the former employee’s name and find the documents that are in this state:
i. New Draft
ii. Awaiting Updates
iii. Review ongoing
iv. Awaits Approval Signature(s)
III. Assignments to the former user such as Periodic Reviews, Supplier Qualifications, Equipment Calibration and Open CAPA and effectiveness assessment schedules should also be checked to ensure that it will be reassigned to an active user to continuously monitor these active assignments. You can reach out to SimplerQMS if unable to perform these tasks.
IV. Retire or update the electronic signature agreement and the access request form of the former employee.
Note: If the Metadata Administrator leaves the company, reach out to SimplerQMS Implementation & Training Team for further assistance