Purpose
Installing M-Files on a PC.
Outcomes and Prerequisites
Outcomes
M-Files has been installed on a PC.
Prerequisites
The PC must comply with the system requirements, see https://www.m-files.com/user-guide/latest/eng/operating_system_requirements.html
Step 1 – Download the M-Files Installation Package
Go through the following steps to install M-Files:
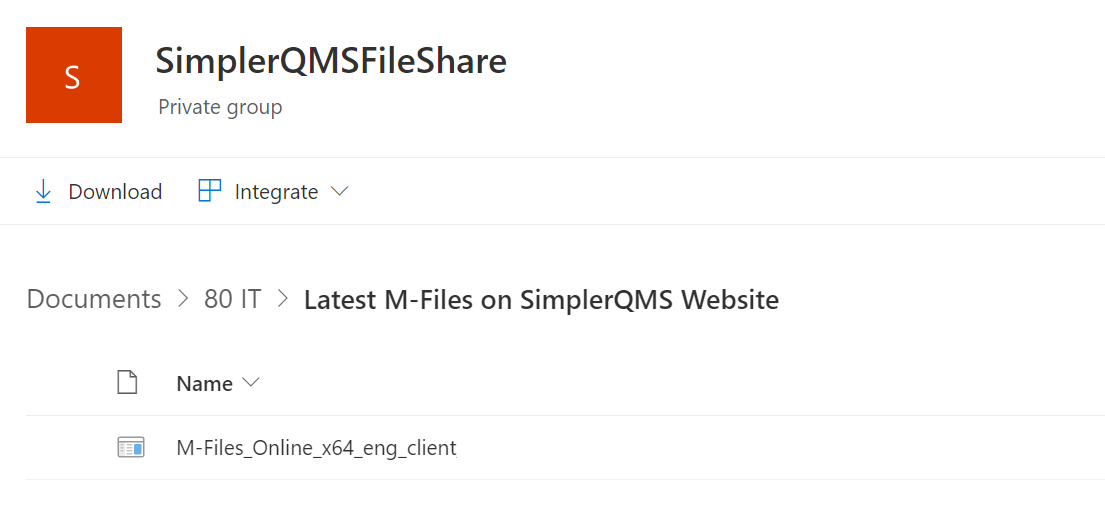
Open a web browser and go to www.simplerqms.com/m-files. You will be redirected to our file share on SharePoint.
Download the installation file and run it:
Step 2 – Install the M-Files Online Application
The M-Files Installation Wizard will appear:
- Click “Next”. The End-User License Agreement will now appear.
- Select “I accept the license agreement” and click “Next”
- Depending on your Windows version and setup, the following dialogue box might appear: “Do you want to allow this app to make changes to your device?” Click Yes. M-Files will now start installing.
- You will then see: “M-Files has been successfully installed.”
- Leave the check box checked “Start M-Files Desktop configuration.”
- Click Finish.
Step 3 – Adding a New Vault
You should now see the following box:
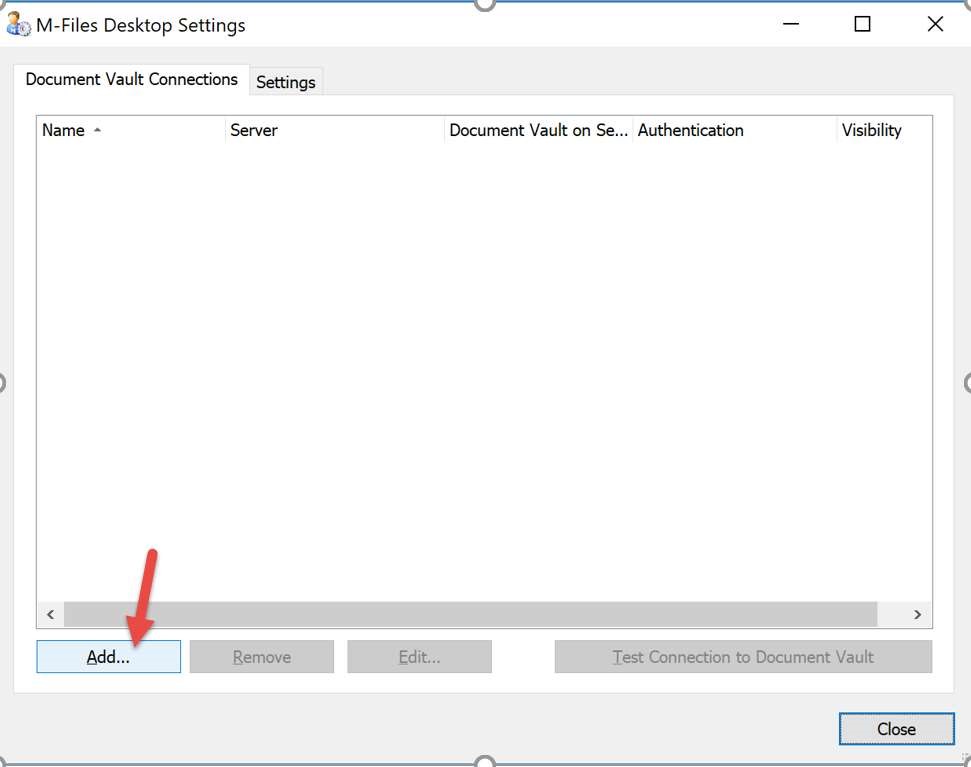
Click Add
If you don’t see the M-Files Desktop Settings box as shown above, then right-click on the M-icon in the Windows Hidden Icons Tray at the bottom right of your screen. Then click Settings > M-Files Desktop Settings.
Step 4 – Setting up your Production Vault
This setup is for your active effective environment. This vault is only accessible by members of your organization and log-in is controlled by your Azure Active Directory.
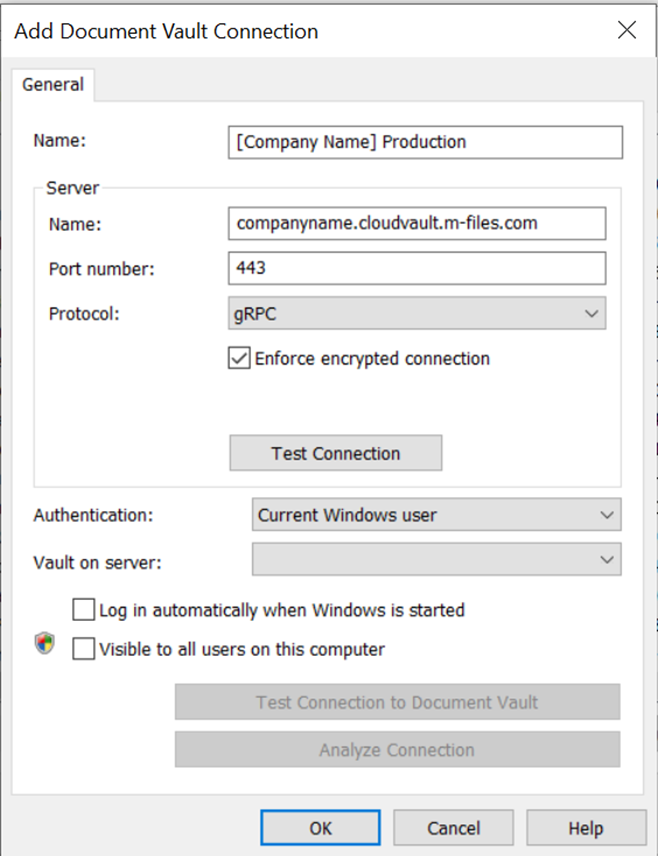
- After hitting “Add” on the M-Files Desktop Settings, input the following information:
- Name: [Company Name] Production (or any name you see fit for your daily use)
- Server Name: [companyname].cloudvault.m-files.com*
- Port Number: 443
- Protocol: gRPC
- Test the Connection by clicking on “Test Connection”
- this should say it succeeded to confirm that all the details above are correct
- Set the Authentication to:Current Windows User
- If you are not logging into your computer with your company credentials (fx name@company.com), then you need to set Authentication to: Specific Windows User. Please ask your IT-administrator or SimplerQMS Support if you are in doubt about this.
- Remove the Check mark in “Log in automatically when Windows is started”
*Replace “companyname” with your organization’s name. If you do not have the correct link, reach out to us and we will provide it.
5. Click on the empty drop-down next to “Vault on Server”.
6. The system should log in automatically as it is using your company email address and password. If not, a Microsoft Log-in window will open:
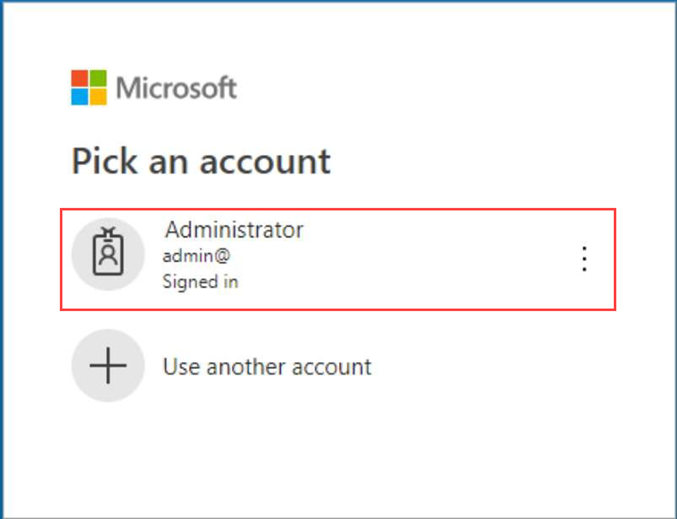
7. Log in using you company account (first option on the Microsoft Log-in window)
8. After log-in the “Vault on the server” will display your own vault titled “[Company Name]”. Select this option
9. Click OK to save the Vault Connection
10. Click Close to close the Vault Connections box
Step 5 – Start M-Files Online
Start the M-Files application by clicking on the M-Files desktop icon.
Select the vault you wish to log into.
Enter the username and password again. (if prompted)
Wait for this dialogue box to appear (this can take up to 20 sec.):
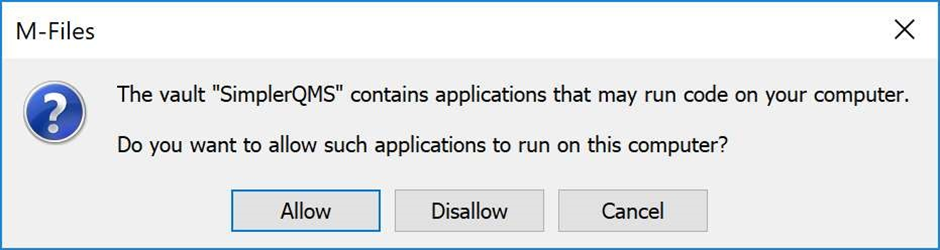
Click Allow. The M-Files Applications has now been installed and will now open.
Step 6 – Automatic Check-in
When a users has worked with a document in Office, then M-Files will by default ask the user if the document should be Checked In, when the document is closed. We recommend that you enable automatic check-in of documents, to make this process easier for the user. This is done in the following way:
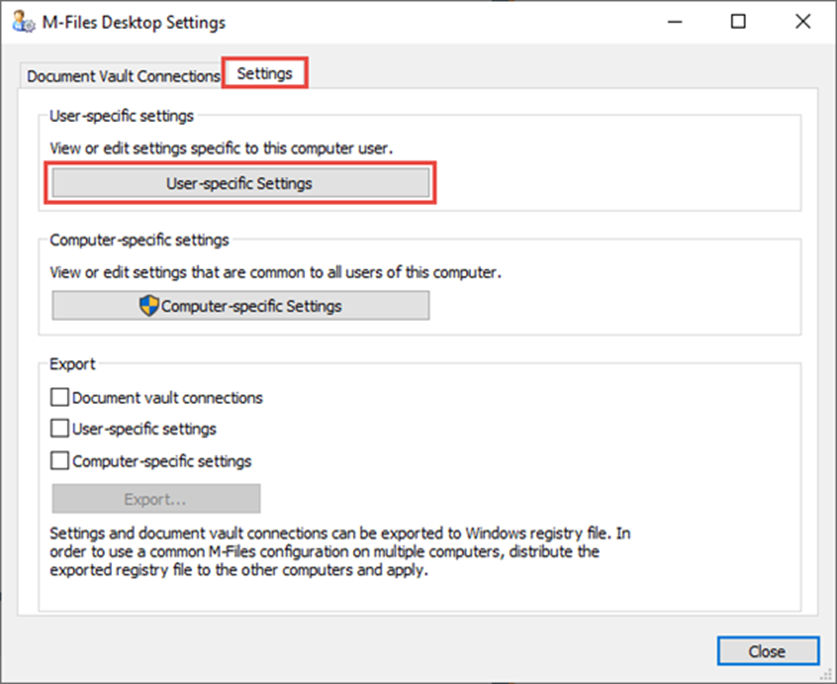
1. Go to M-Files Desktop Settings and choose the “Settings” tab.
2. Click User-specific Settings
3. Select “Check in immediately” in the “Behavior at file close” section and click OK
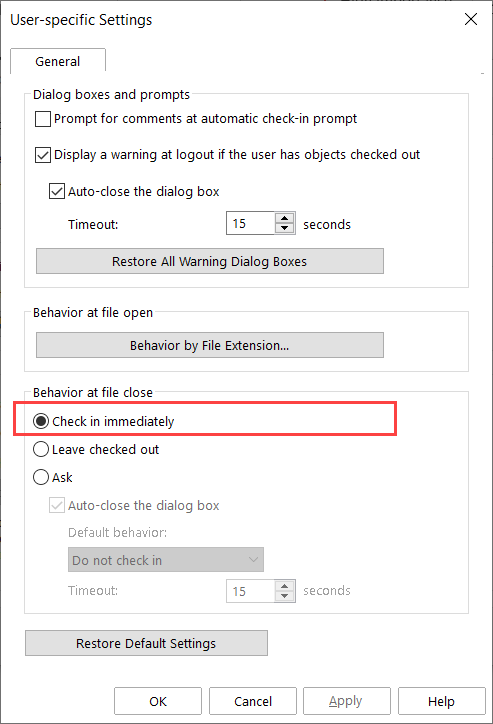
Documents will now be checked in automatically each time you close them, ensuring that no documents stay checked out to you and can easily be accessed by other users of the system, and mitigating the risk of information loss.