Purpose
Learn how to:
- Contact SimplerQMS through the SimplerQMS Helpdesk
- Follow new and existing tickets created
- Access the SimplerQMS support website and create a profile as a key user
- Navigate through the knowledge base
Expected Outcome
- Customers will have an enhanced way of contacting SimplerQMS for support
- Feedback is more convenient to share
Prerequisites
- Access to a browser
- Email address to create an account
Overview of Responsibilities
| Step | Task | Owner |
| 1 | Send an email to SimplerQMS Helpdesk | Customer |
| 2 | Create a SimplerQMS Helpdesk account | Customer |
| 3 | Managing account – additional information | Customer |
| 4 | Exploring the dashboard | Customer |
| 5 | Follow existing tickets | Customer |
| 6 | Adding more information in the ticket | Customer |
| 7 | Closing the ticket & sending a rating | Customer/Agent |
| 8 | Creating ticket from the customer portal | Customer |
Section 1: Send an email to SimplerQMS Helpdesk
Sending an email to SimplerQMs helpdesk for the first time is just like sending a regular email. With your email address (or company email address) you can send an email to SimplerQMS helpdesk with no issues.
I. Send email to support@simplerqms.com – The email can contain the subject, body of the email which can also contain screenshots and the description of the issue that you need support with and attachments if necessary
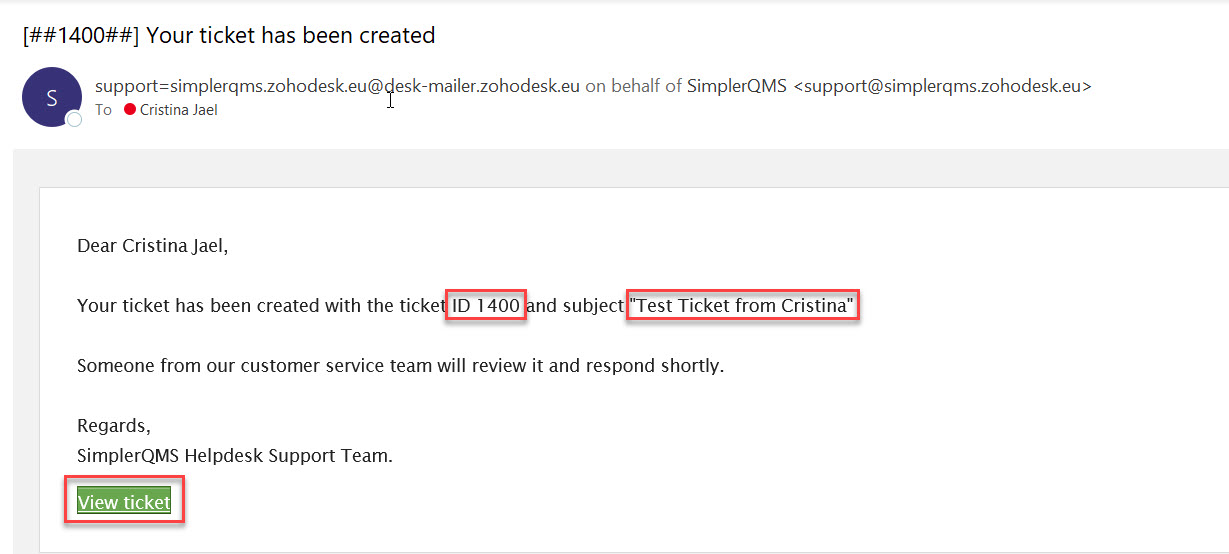
II. Email response from SimplerQMS Helpdesk – An email response from SimplerQMS Helpdesk will be received less than a minute upon sending the email. This contains the ticket number, subject of the email, and a link to view the ticket created.
Section 2: Create a SimplerQMS Helpdesk account
I. Sign up – From the email response received after sending an email to SimplerQMS Helpdesk, click on ![]()
![]()
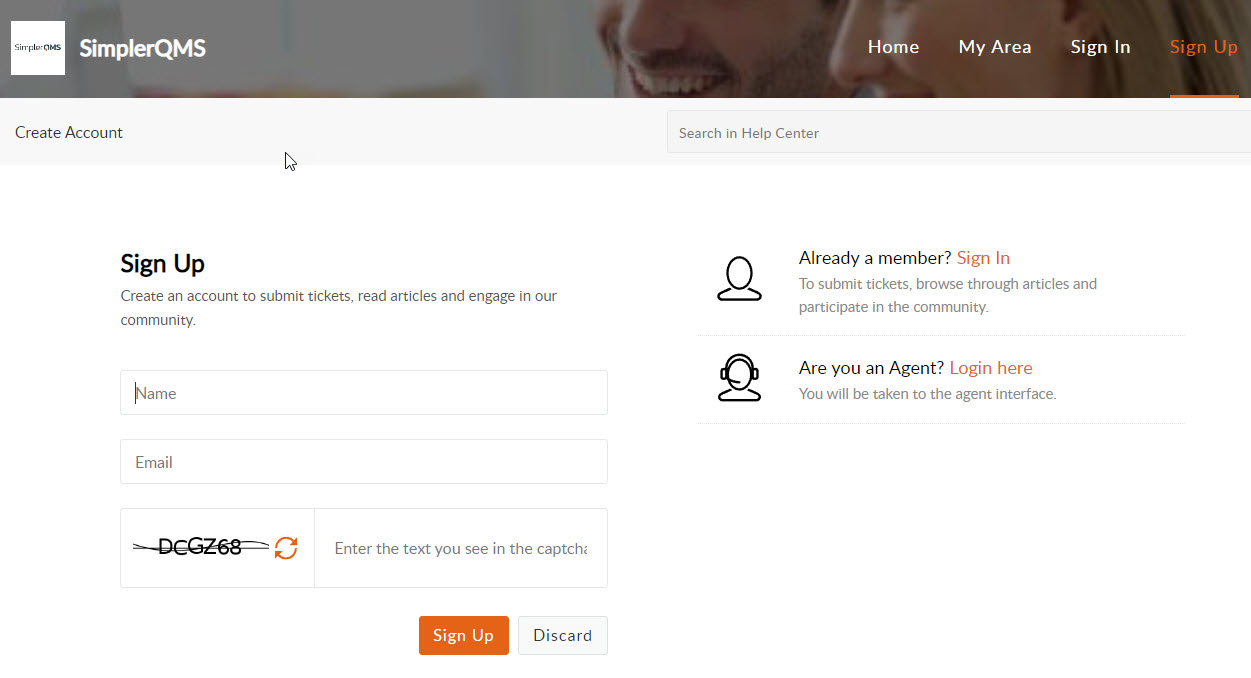
II. On the support website, click on Sign Up – Enter name and email address and enter the Captcha correctly.
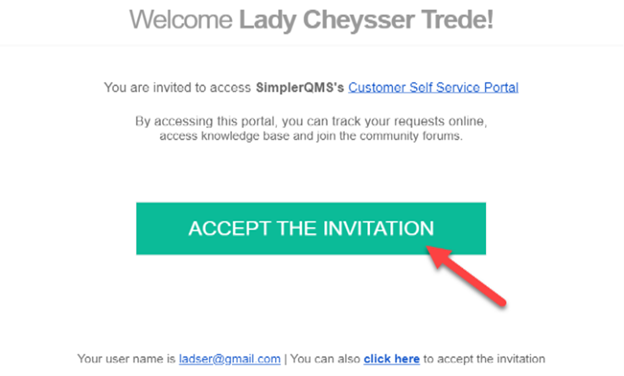
III. Administrator’s approval – Once the name and email address have been entered The SimplerQMS Helpdesk administrator will approve the request and the customer will receive an invitation email

IV. Click on the accept Invitation.
Create your password.
Section 3: Managing Account – Additional profile information
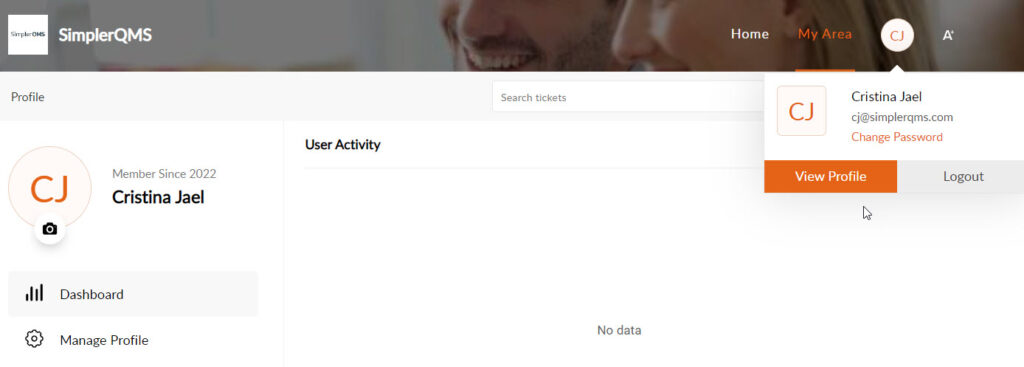
After setting up the password, the profile creation is now completed. You will be redirected to the profile page where you can edit your profile and provide additional information.
I. Edit User information such as name, display name, and picture
II. Add Contact Information – mobile/phone information
III. Social media accounts can also be added if necessary
IV. Location & time zone – set the correct country based on where you are located and the correct time zone
V. Change/update password

After editing, click on Save.
NOTE: Delete Profile – If you wish to delete the profile, at the bottom of the profile page, click on I understand, continue.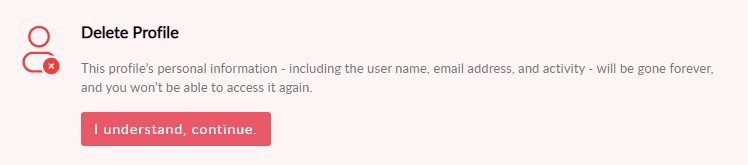
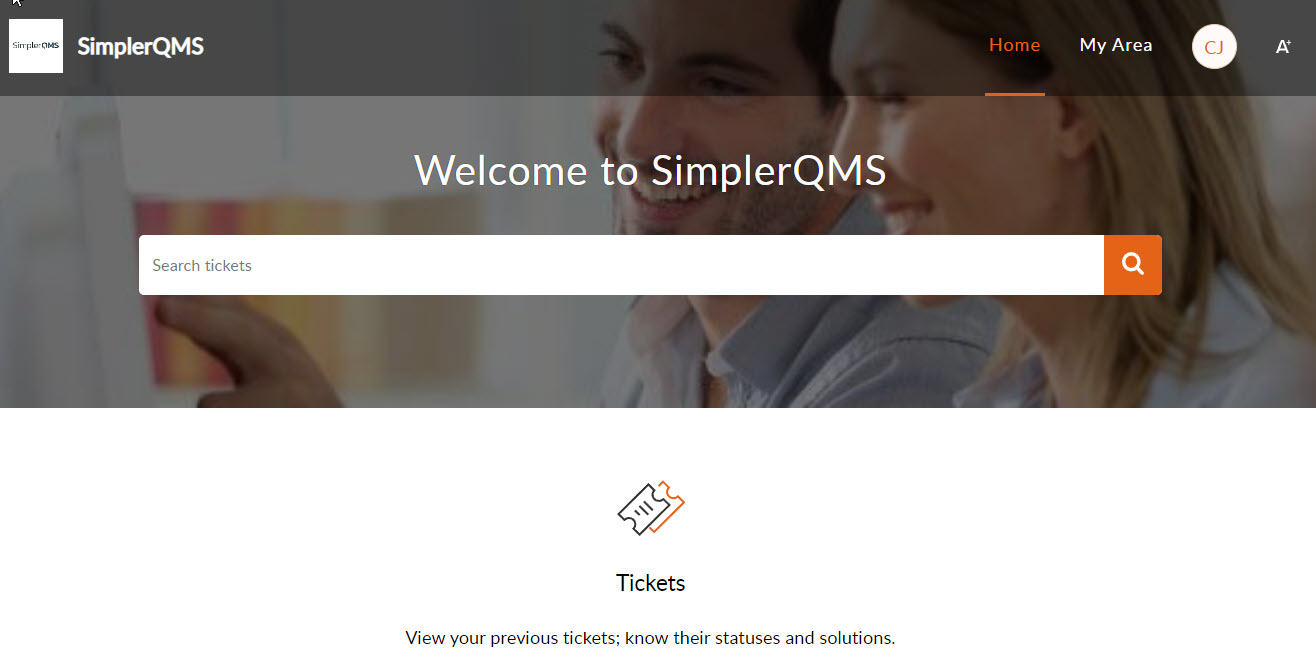
Section 4: Exploring the Dashboard
Home – shows a summary of all your tickets
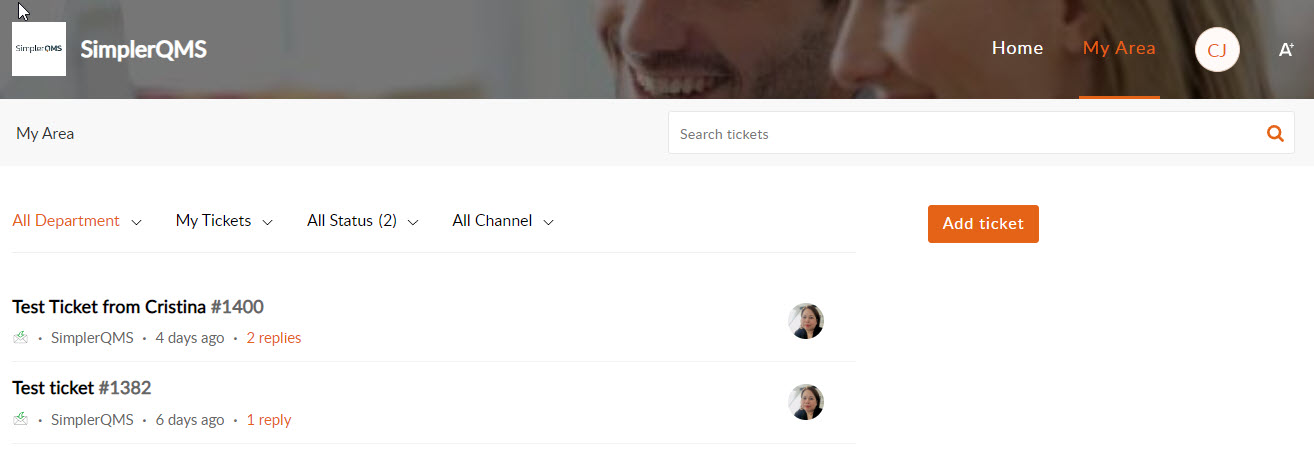
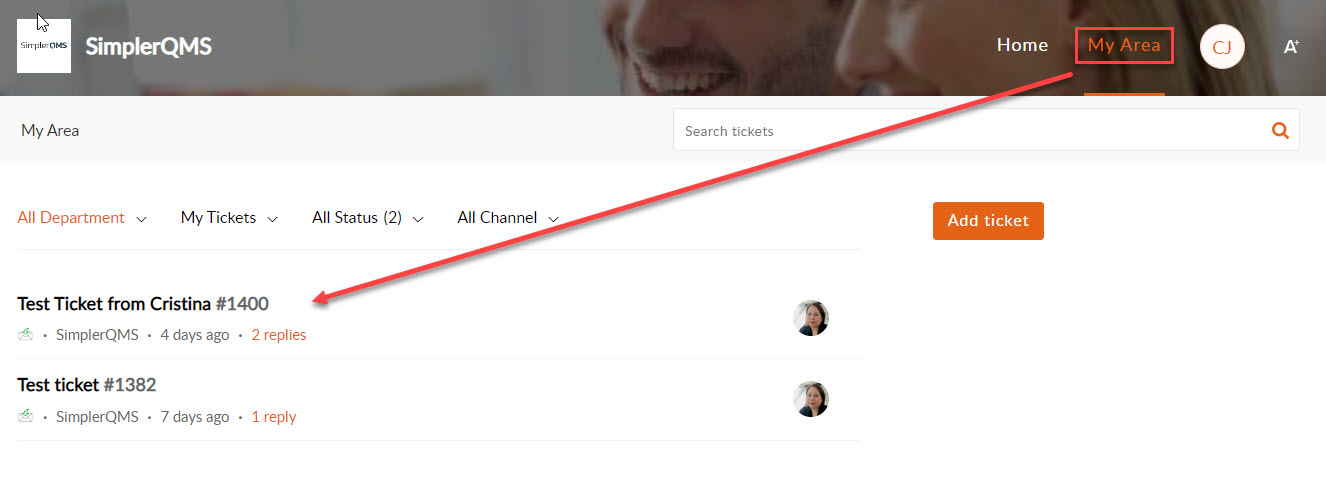
My Area – shows a summary of all tickets from all departments within your organization, your own ticket and the teams’ tickets according to their status and channel
View Profile – here you will see your dashboard based on the tickets submitted. For editing your profile, click on Manage Profile.
Section 5: Follow existing tickets
Email update from SimplerQMS Helpdesk agent – When the SimplerQMS helpdesk agent responds to the customer’s ticket, the customer will receive an email about the update.

On the email. It has the message from the agent and a link to direct the customer in the ticket page to see the update.
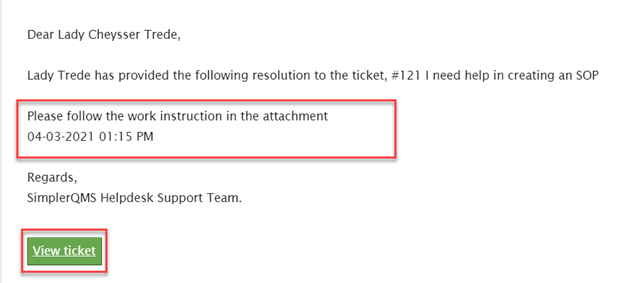
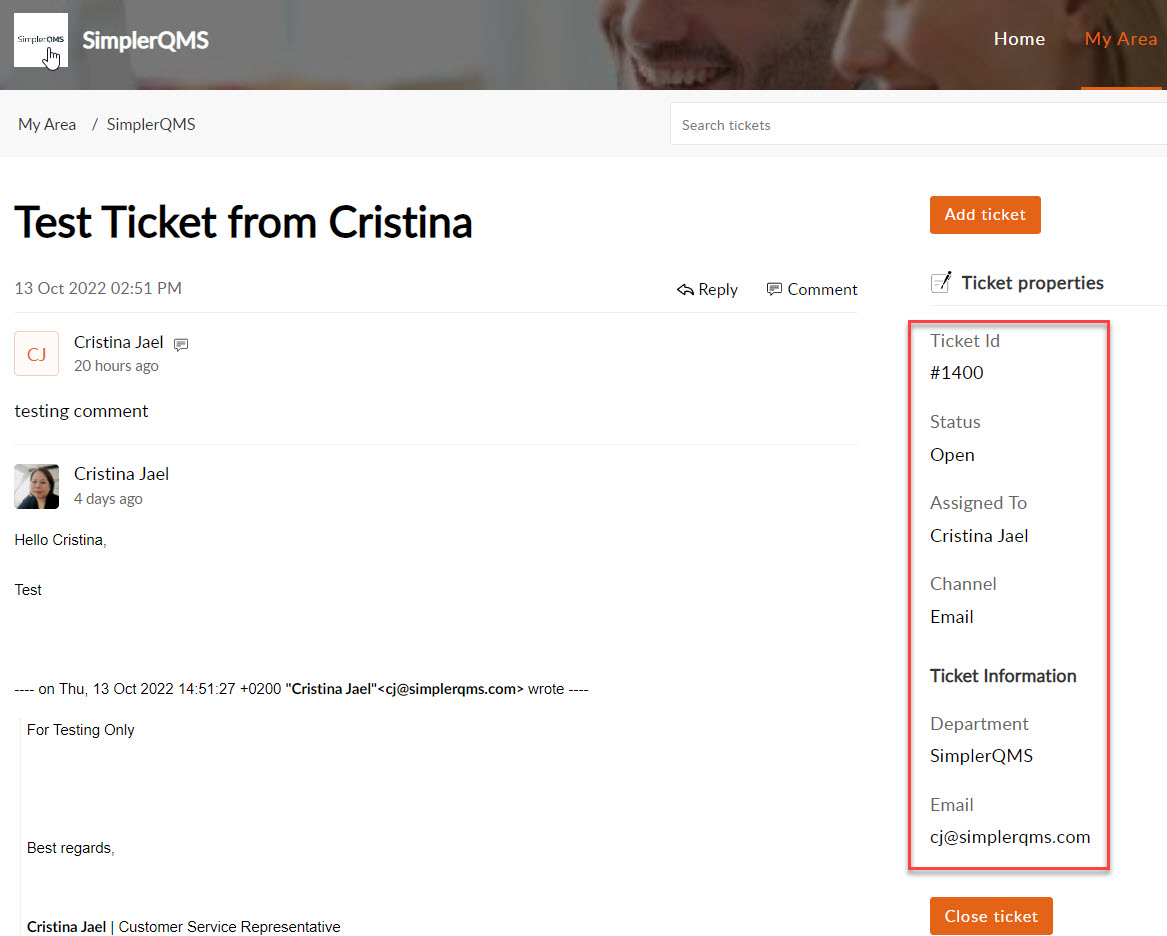
The ticket page contains the following information:
I. Ticket ID
II. Status – Open, On-hold, Escalated or Closed
III. Name of the agent assigned to the ticket
IV. Channel – how the ticket was created
V. Department
VI. Customer’s email
VII. History of the ticket – conversation flow & resolutions
I. Accessing the ticket directly from the website
a. Log in to https://support.simplerqms.com/portal/en/signin using the username and password
b. Click on “My Area” – this shows the list of tickets the customer has created, Click on the ticket you want to check
Section 6: Adding more information in the ticket
If the customer wishes to request for more details or the customer would like to communicate with the agent, it will allow the customer to respond to the ticket directly from the customer portal.
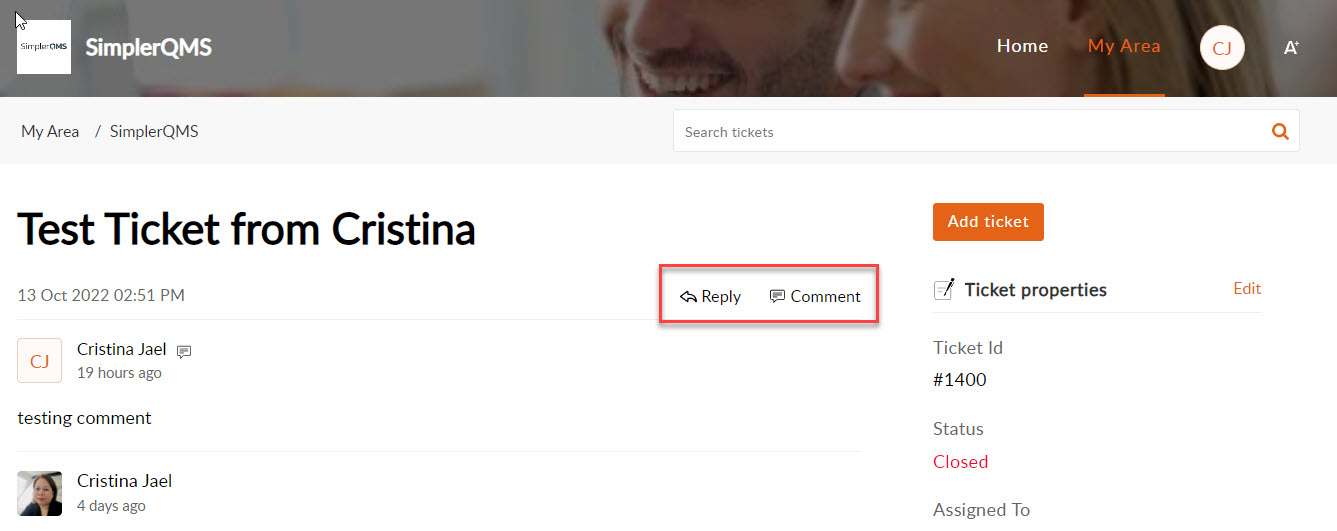
On the ticket, click on Reply or Comment – these functionalities have the same effect on the ticket, Both reply and comment will allow the customer to type in messages, add screenshots and attachments.
Section 7: Closing the ticket
If the resolution provided by the agent resolves the issue, the ticket can either be closed by the agent or by the customer.
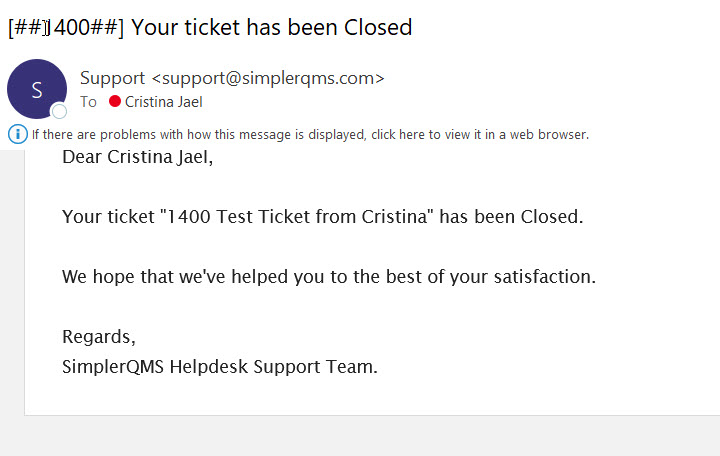
I. Closing the ticket by the agent – When the ticket is closed by the agent, customer will receive an email notification about the ticket being closed on the same email, there will be an option to send a rating.
II. Closing by the customer – In the customer portal, on the ticket properties, an option to close the ticket is available. The customer will also receive an email notification and on the same email, there will be an option to send a rating

NOTE: You may find a statement on the same email that responding will re-open the ticket, this is no longer the case. Re-opening the ticket can only be done by the agent. If there is a need to re-open the ticket, customer can still respond to this ticket, the agent will still be able to see the email, nevertheless, ticket remains closed.
III. Send a rating – On the same email notification about the closed ticket, the customer can also send a rating for customer satisfaction. It can be rated as good, okay, or bad. Also, a comment can be included to provide specific rate.

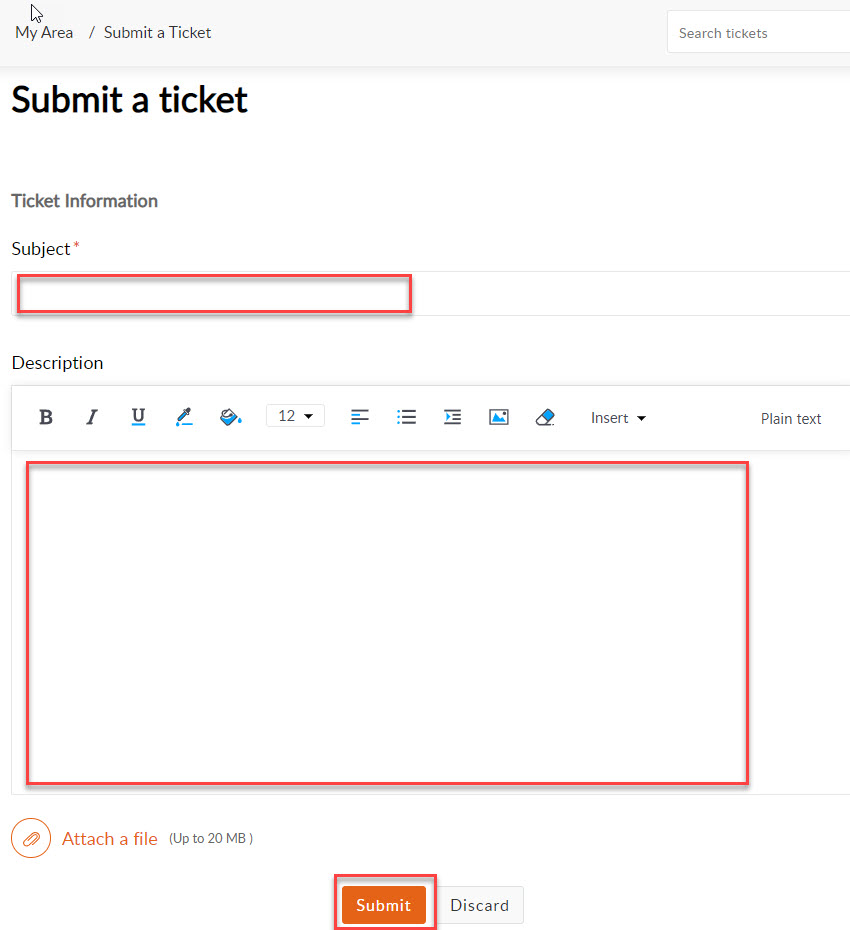
Section 8: Creating a ticket from the customer portal
Once the profile has been established in the SimplerQMS Helpdesk customer portal. The customer can now create a ticket from the portal.
I. Log in to your account
II. Click on My Area or tickets from the homepage
III. Click on Add ticket

IV. Add necessary information such as subject, body of the email, screenshots, and attachments, and then click on Submit.
NOTE: An email will be sent to the customer with the ticket information such as the ticket number and the link to follow the ticket.